Introduction: Why 3D Model Optimization Matters
Optimizing 3D models is crucial for delivering immersive gaming and VR/AR experiences. It goes beyond creating visually appealing graphics; it’s about striking the right balance between detail, performance, and fluid gameplay. Techniques such as low-poly modeling, physically-based rendering (PBR) textures, and normal map baking significantly improve loading speeds, rendering efficiency, and overall interactivity.
In this article, we’ll explore the optimization process using our American-Style Mailbox 3D Model as a practical example. You'll discover how strategic optimization can elevate the realism and responsiveness of your game projects.

Optimized 3D Model of an American Style Mailbox, Game Ready
Understanding Low-Poly Models: Performance Without Compromise
What Is a Low-Poly Model?
A low-poly model uses fewer polygons, reducing computational demands and improving game performance across various hardware specifications. The key advantage is delivering visual quality without compromising gameplay fluidity.
Benefits of Low-Poly Models in Gaming:
- Faster Loading Speeds: Less complexity means quicker loading, getting players into the game swiftly.
Reduced Game Lag: Lower polygon counts mean less processing power required, resulting in smoother gameplay experiences.
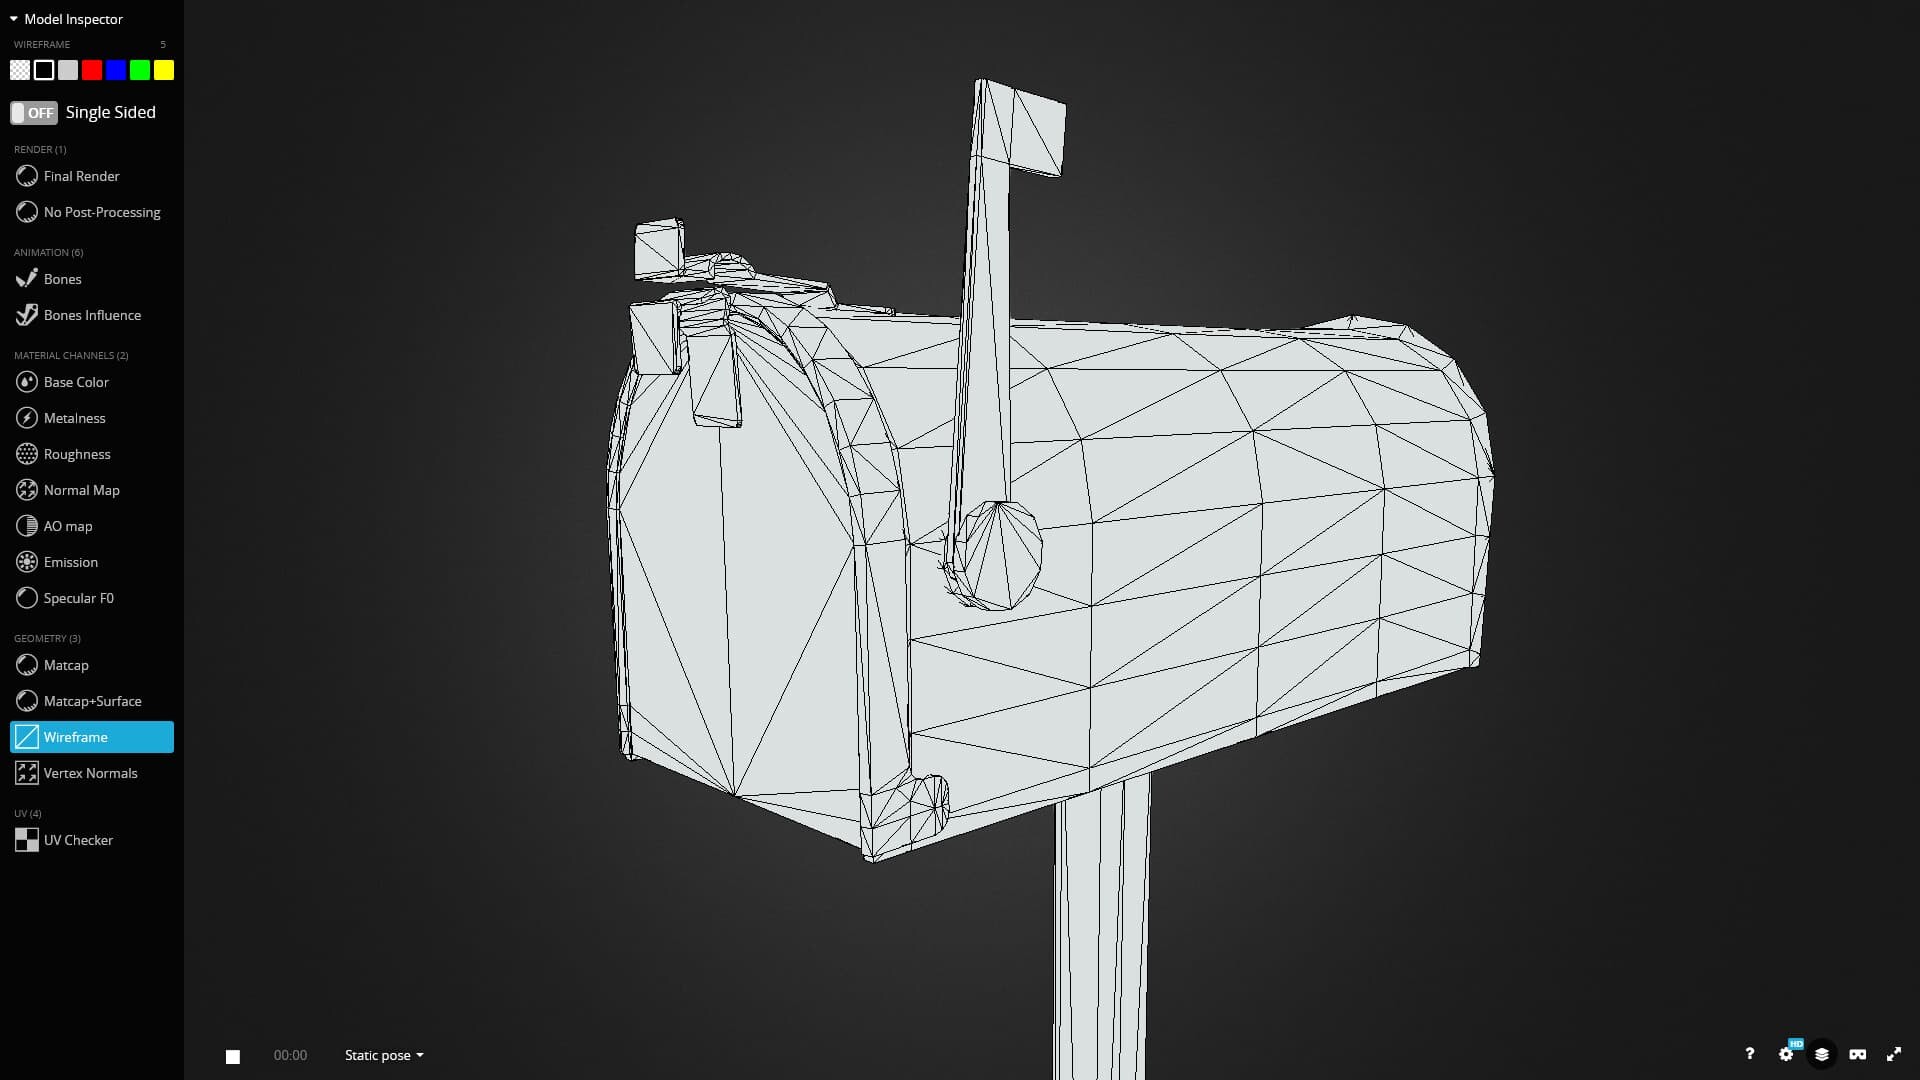
Wireframe View of American Style Mailbox 3D Model - Illustrating Low-Poly Design
High-Poly to Low-Poly: Retaining Detail Through Normal Map Baking
Optimizing models involves transforming detailed, high-poly models into efficient low-poly counterparts without losing visual fidelity. The essential technique used here is normal map baking.
High-Poly to Low-Poly Modeling
This process recreates a detailed high-polygon model as a simplified low-polygon model. The goal is to retain critical details while drastically reducing polygon count.
The Magic of Normal Map Baking
Normal map baking captures intricate details from high-poly models into textures applied to low-poly versions, simulating depth without extra geometry. This technique ensures efficiency without sacrificing realism.
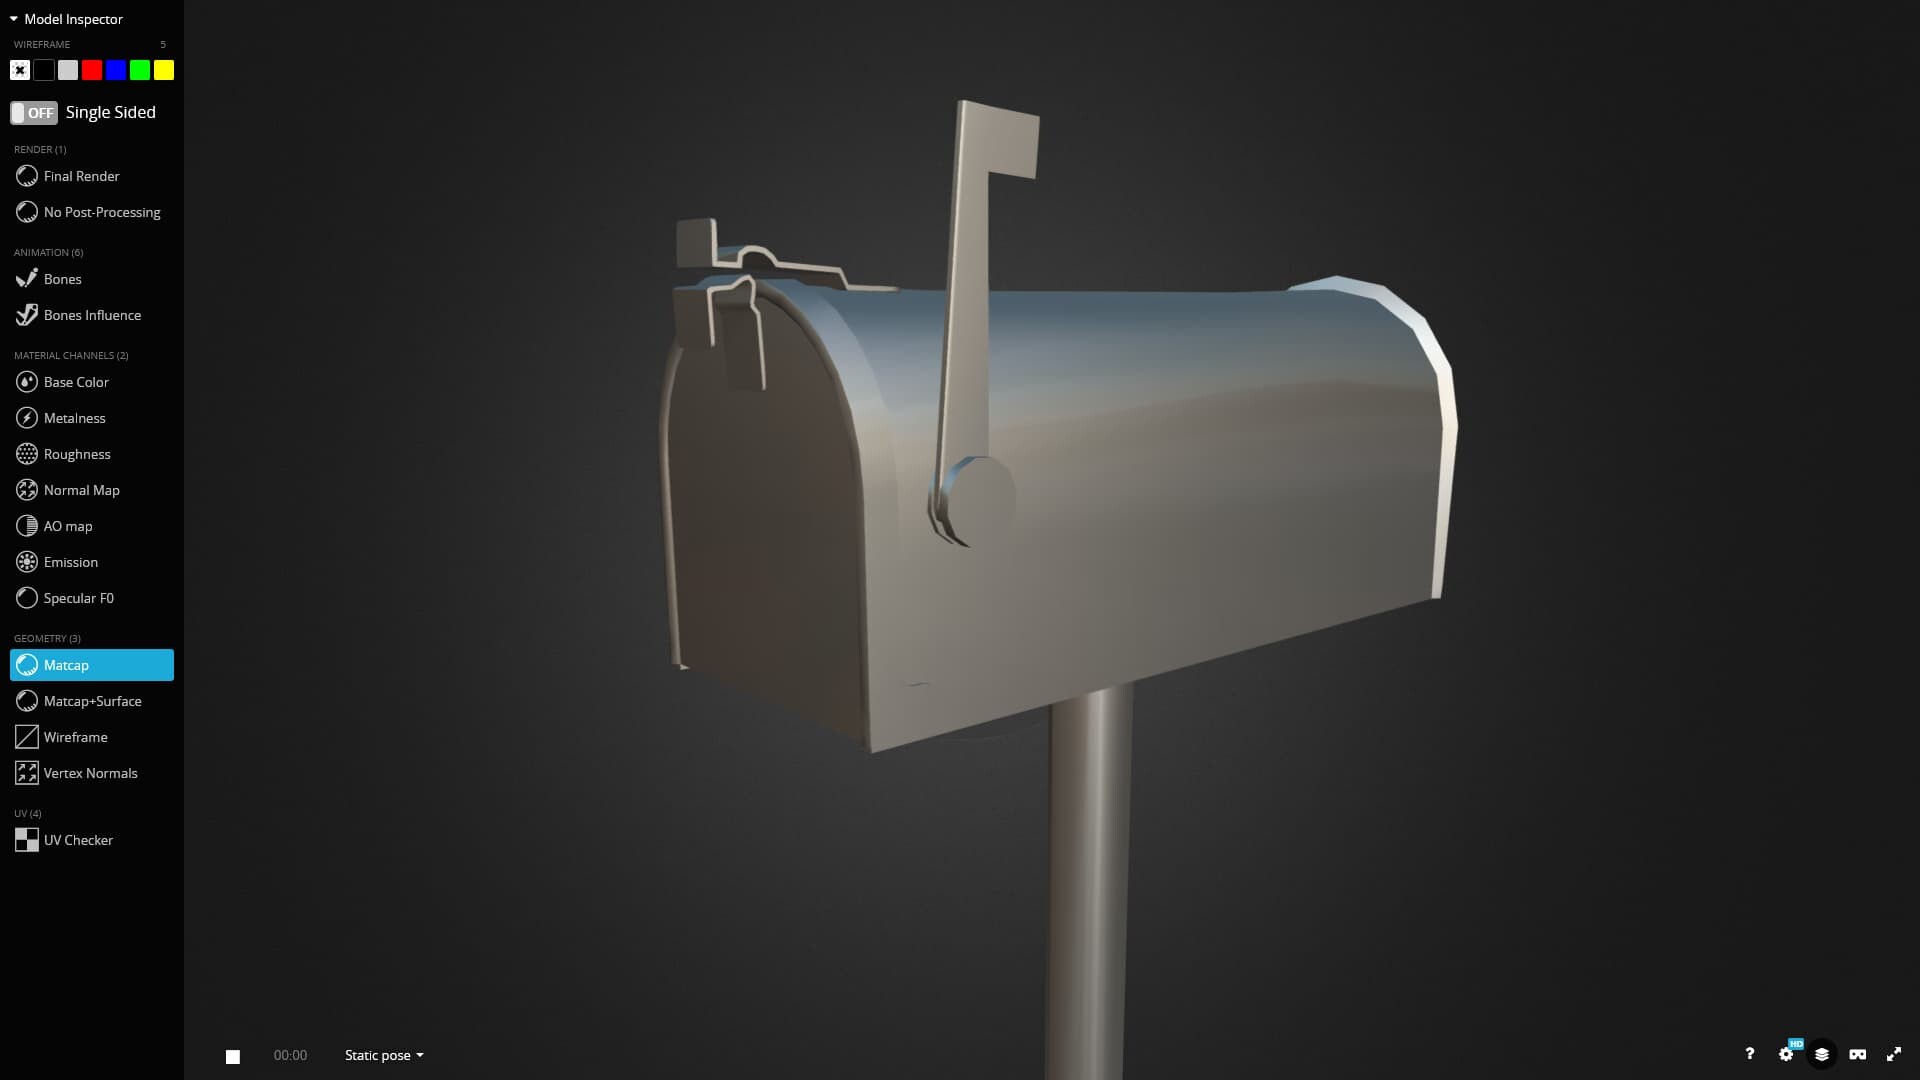
Matcap View of LowPoly American Style Mailbox 3D Model without Normal Map
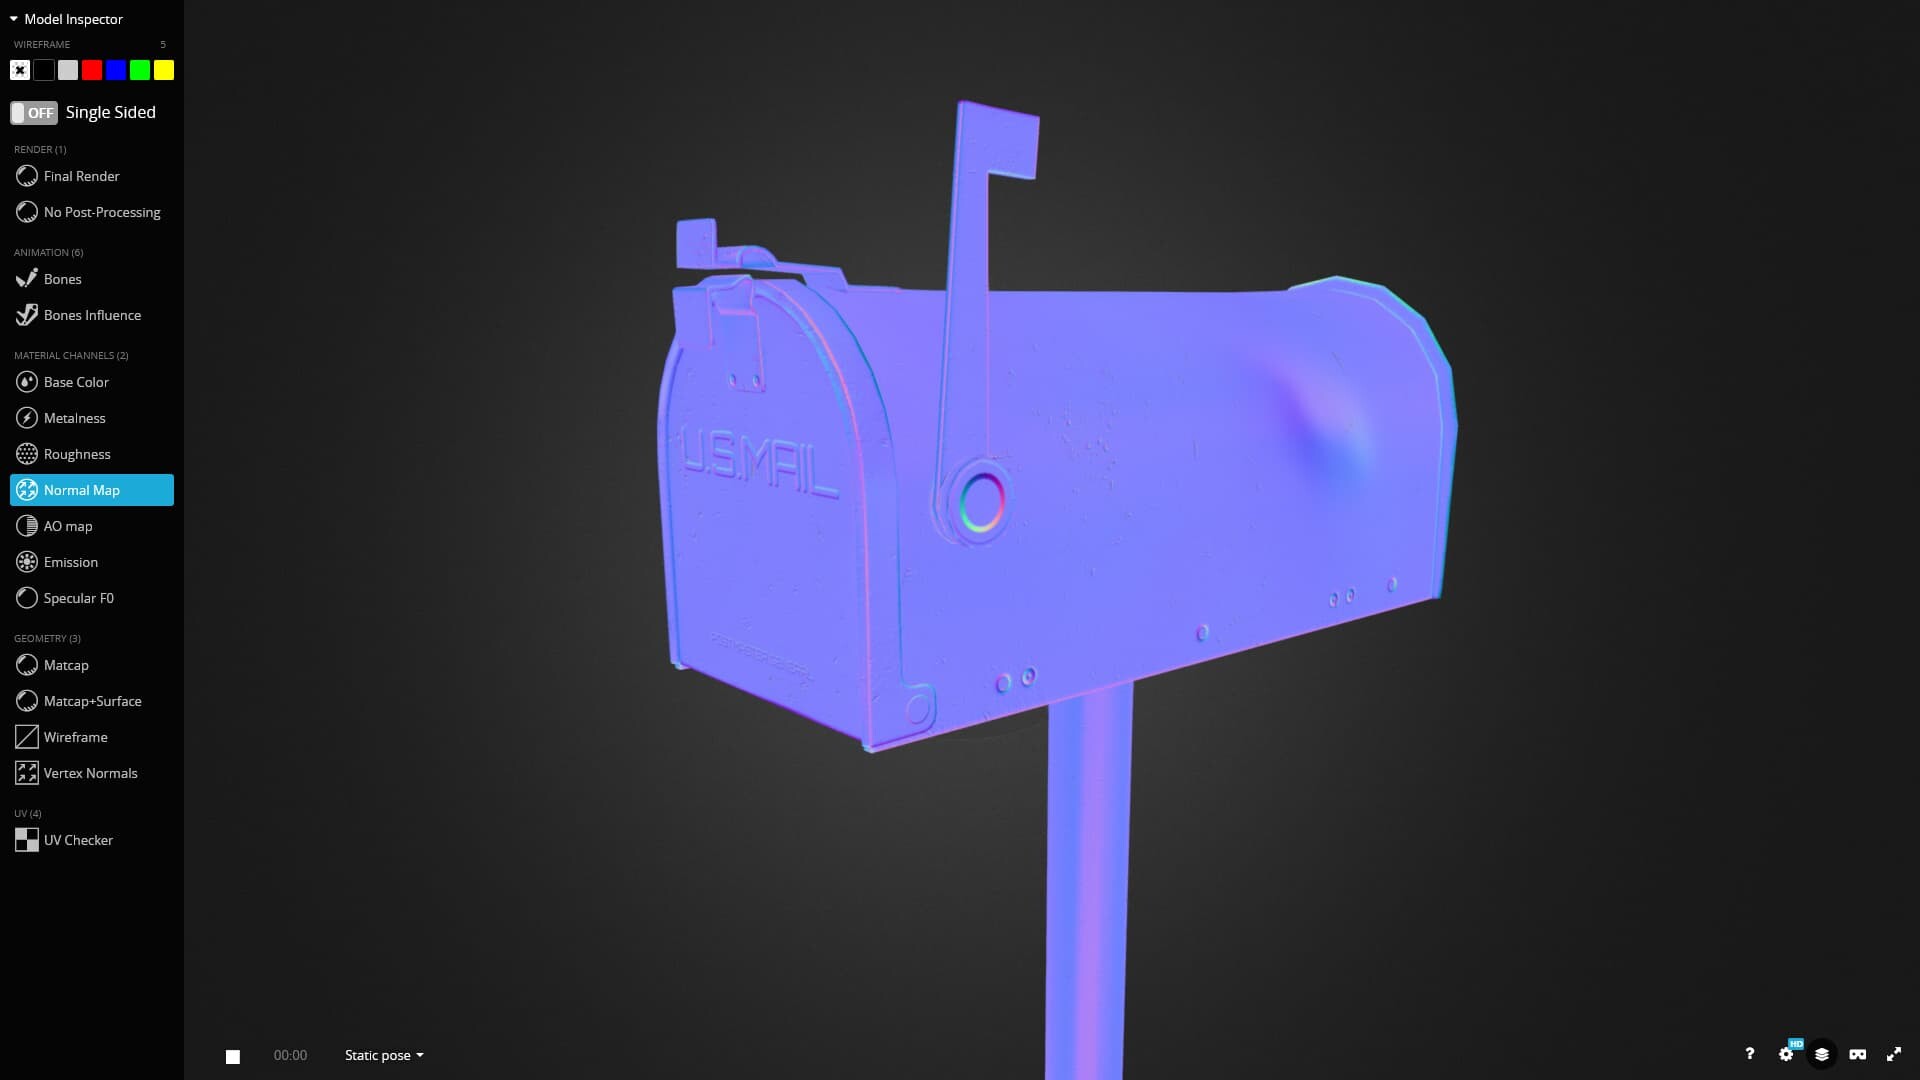
Detailed View of LowPoly American Style Mailbox with Normal Map
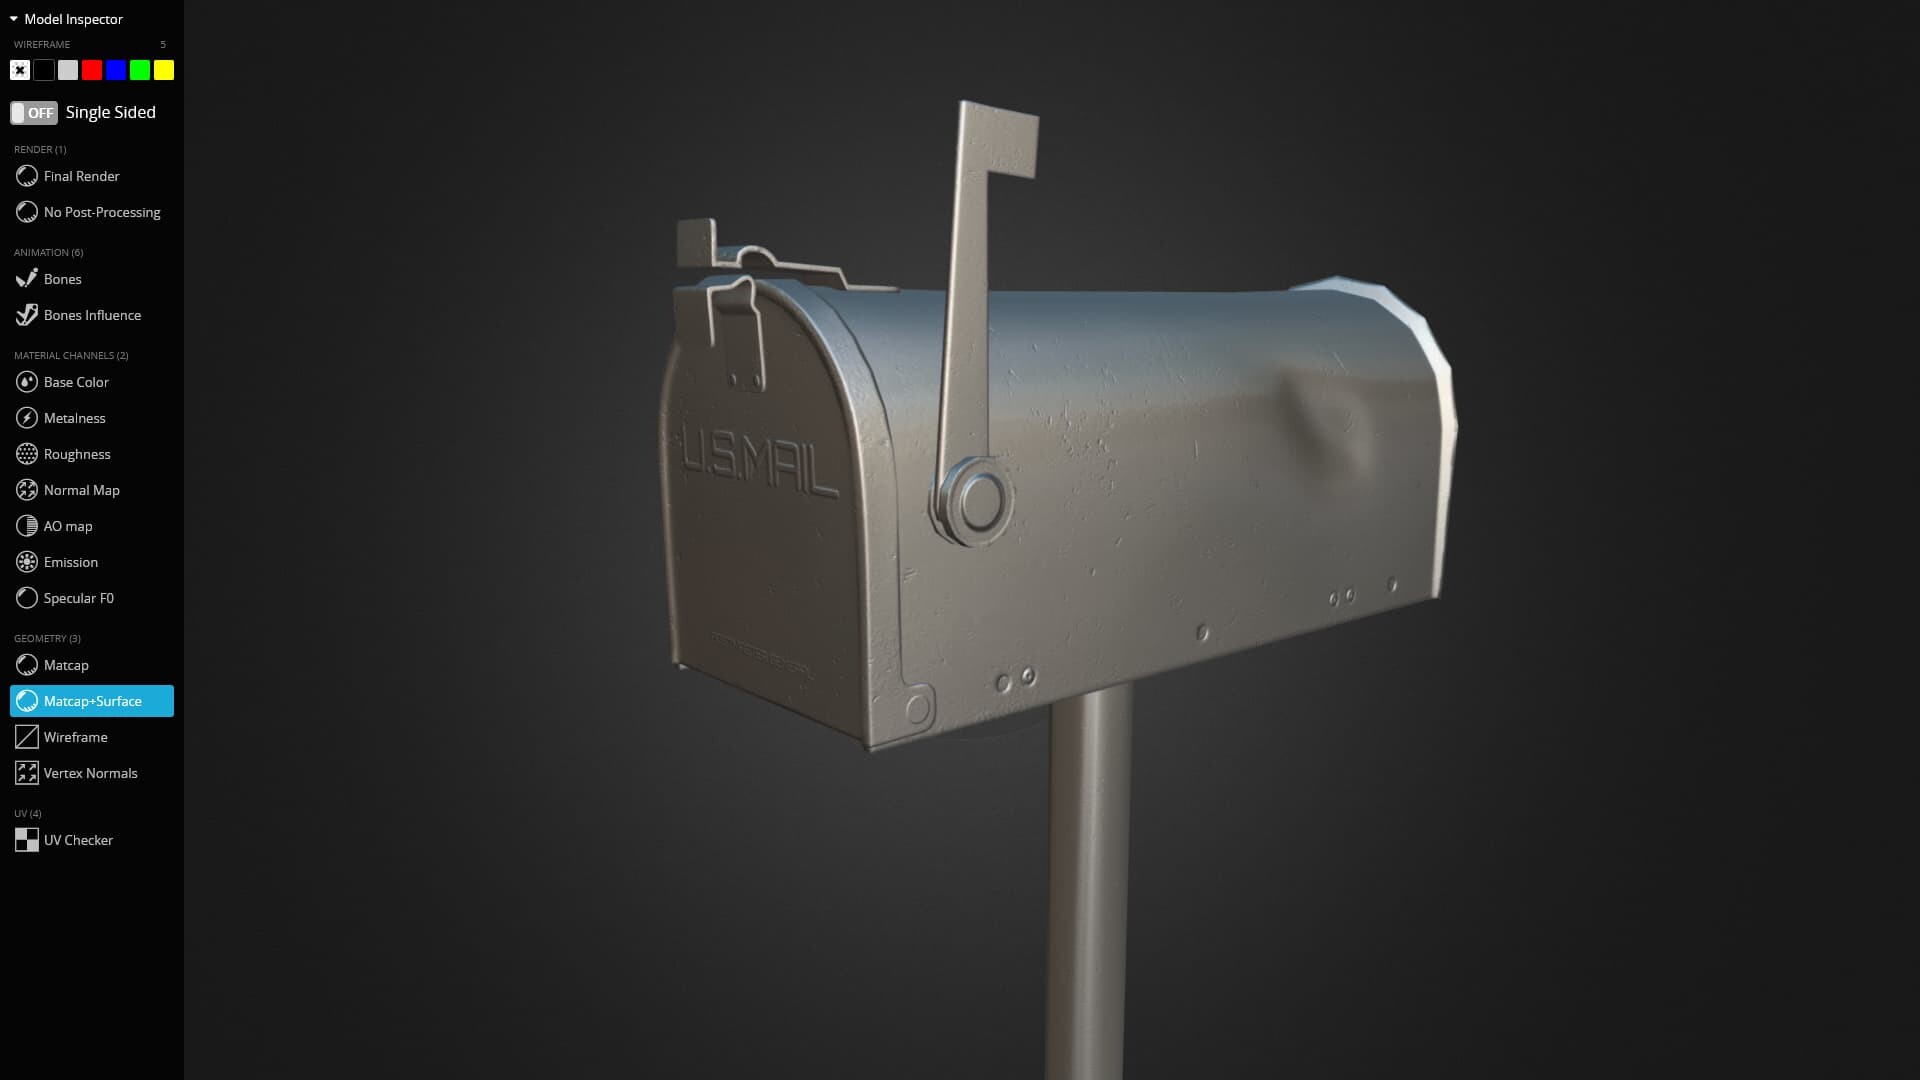
Detailed Matcap View of LowPoly American Style Mailbox with Normal Map Applied
Case Study: Optimizing the American-Style Mailbox 3D Model
Let's explore step-by-step how we optimized our American-Style Mailbox:
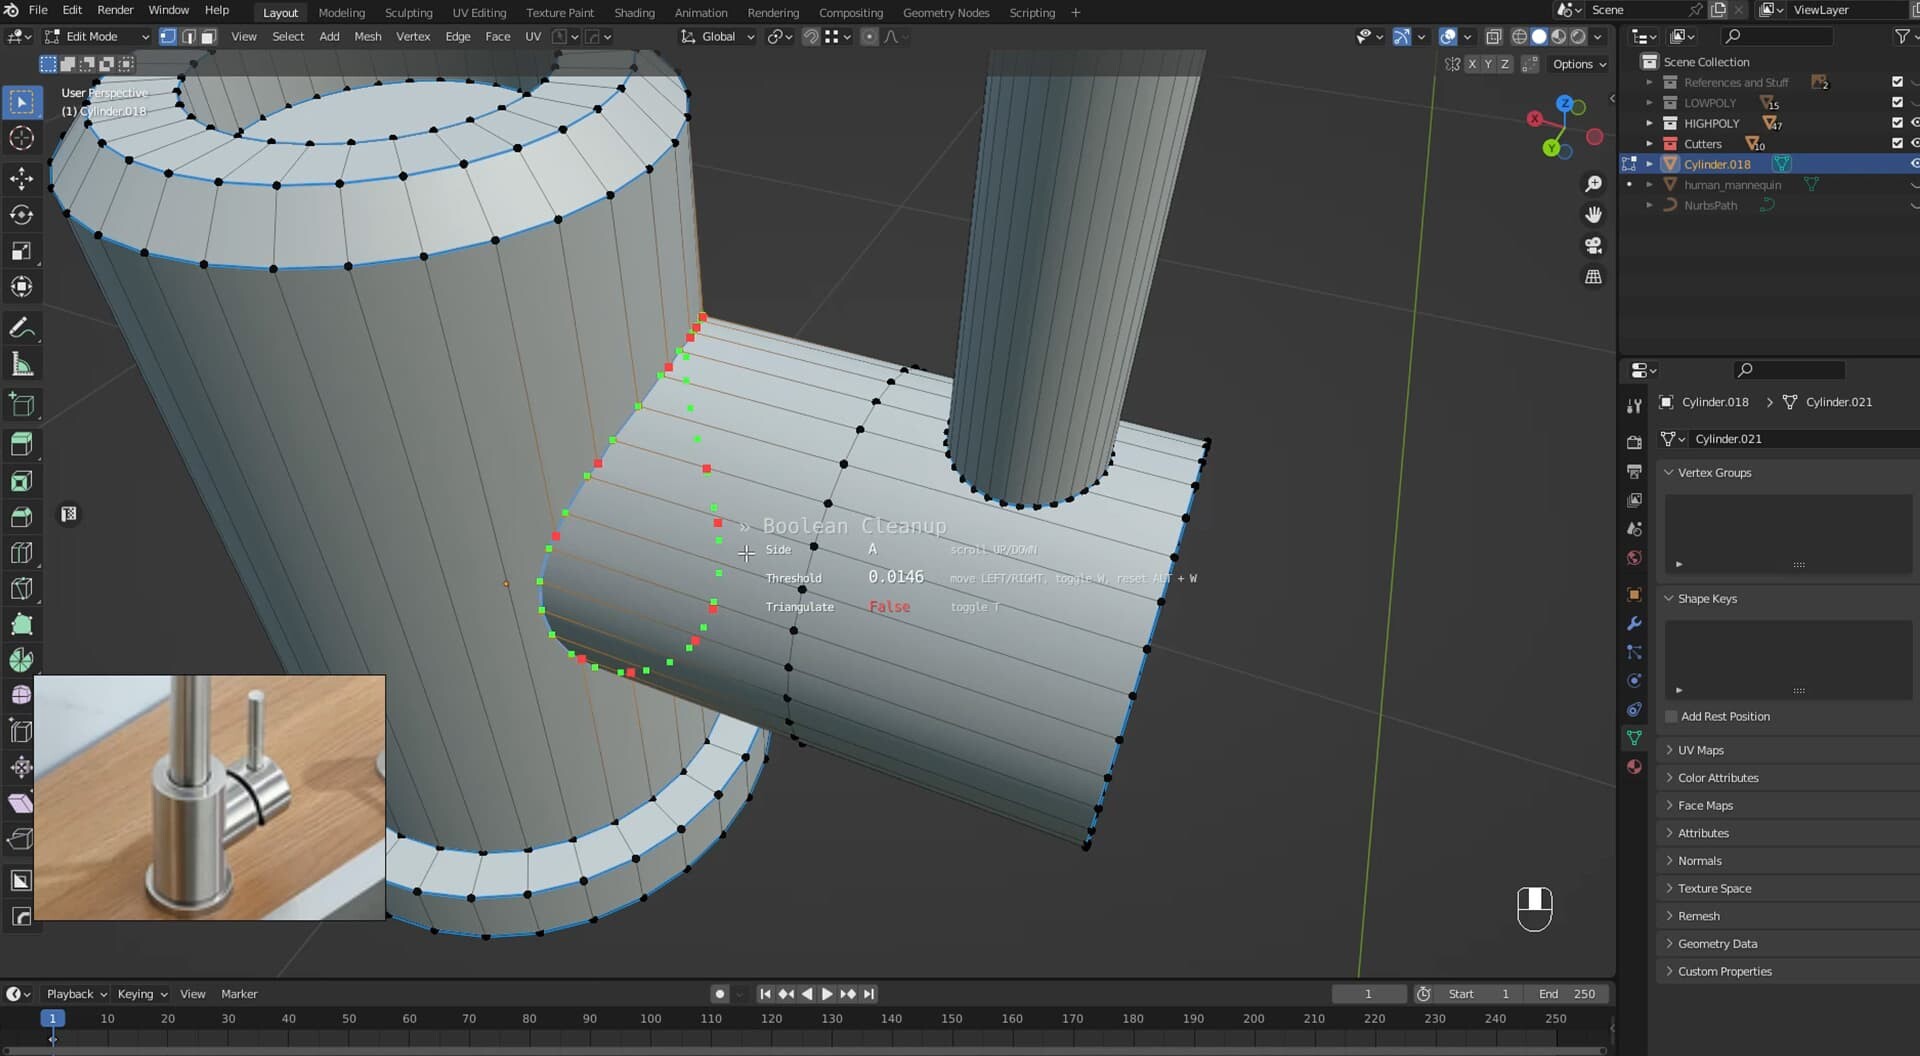
Step 1: From High-Poly to Low-Poly
- Utilized non-destructive techniques (modifiers retained in the high-poly version).
- Created the low-poly version through careful retopology, significantly reducing polygon count.
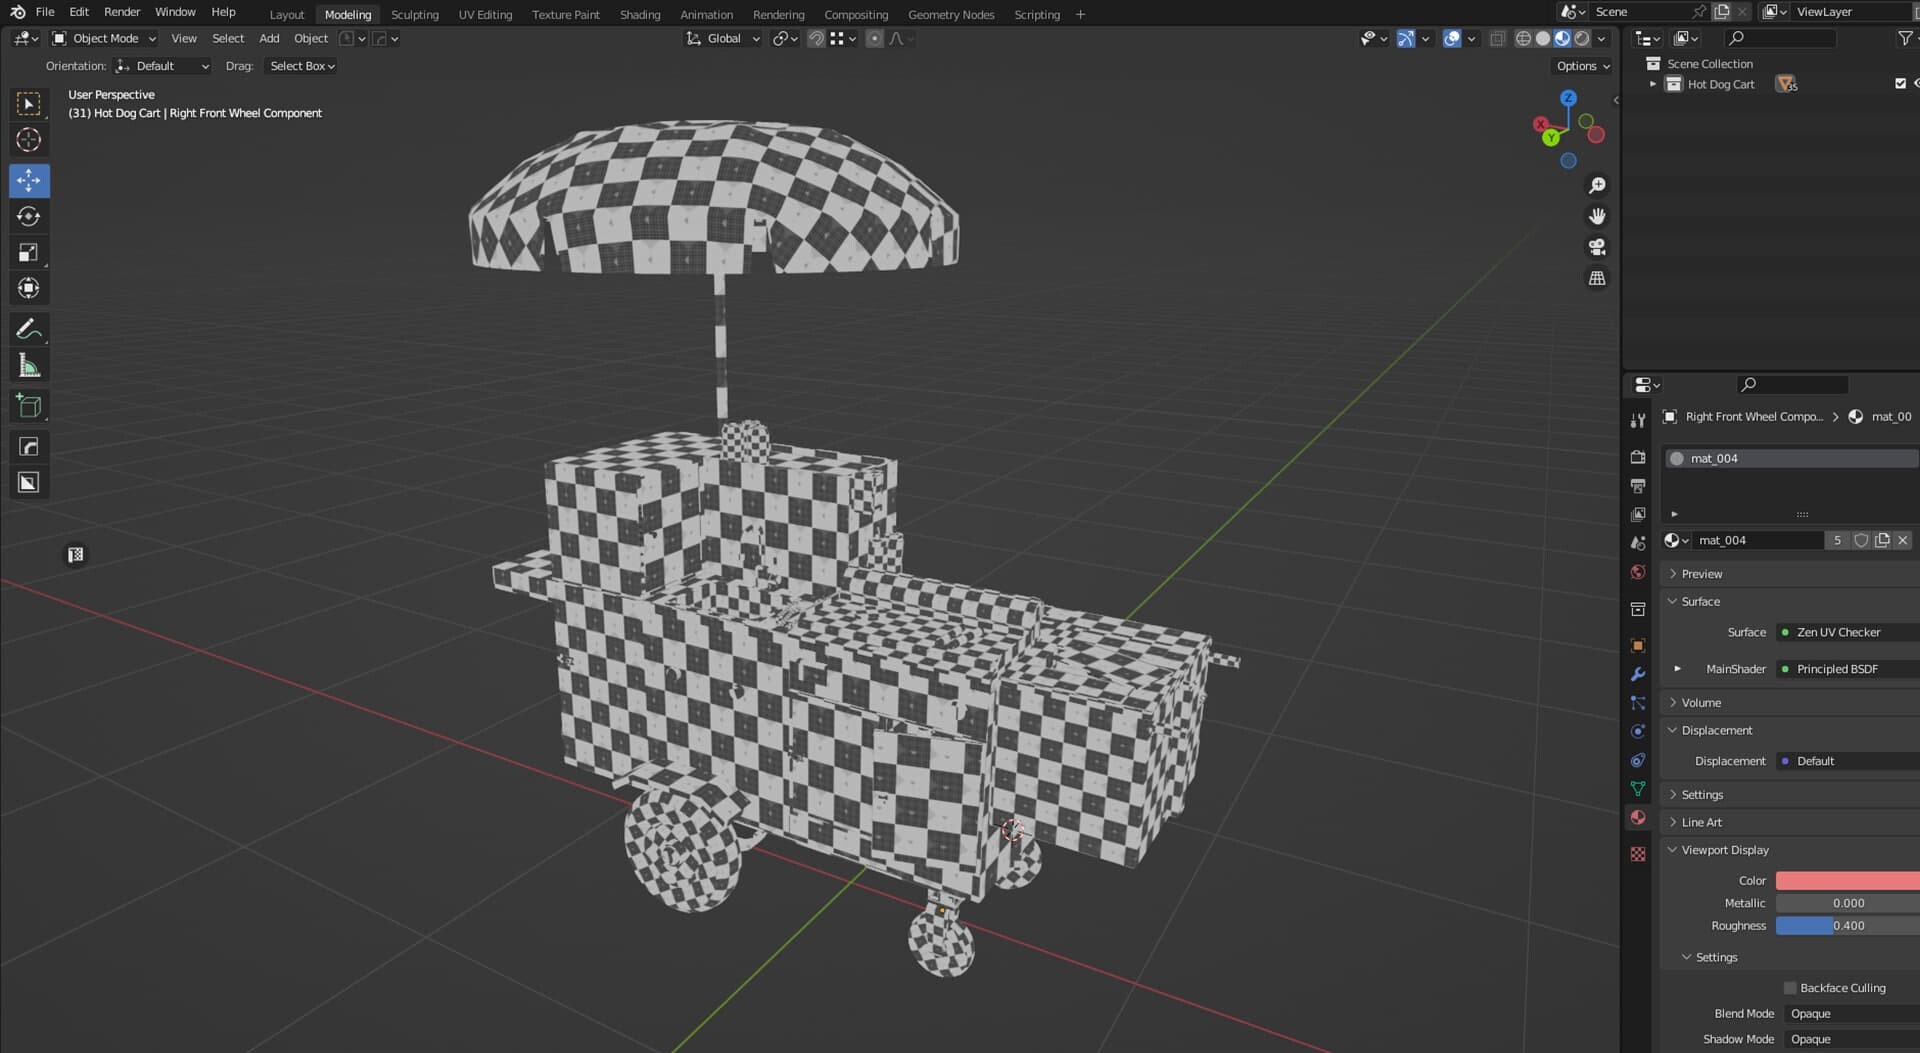
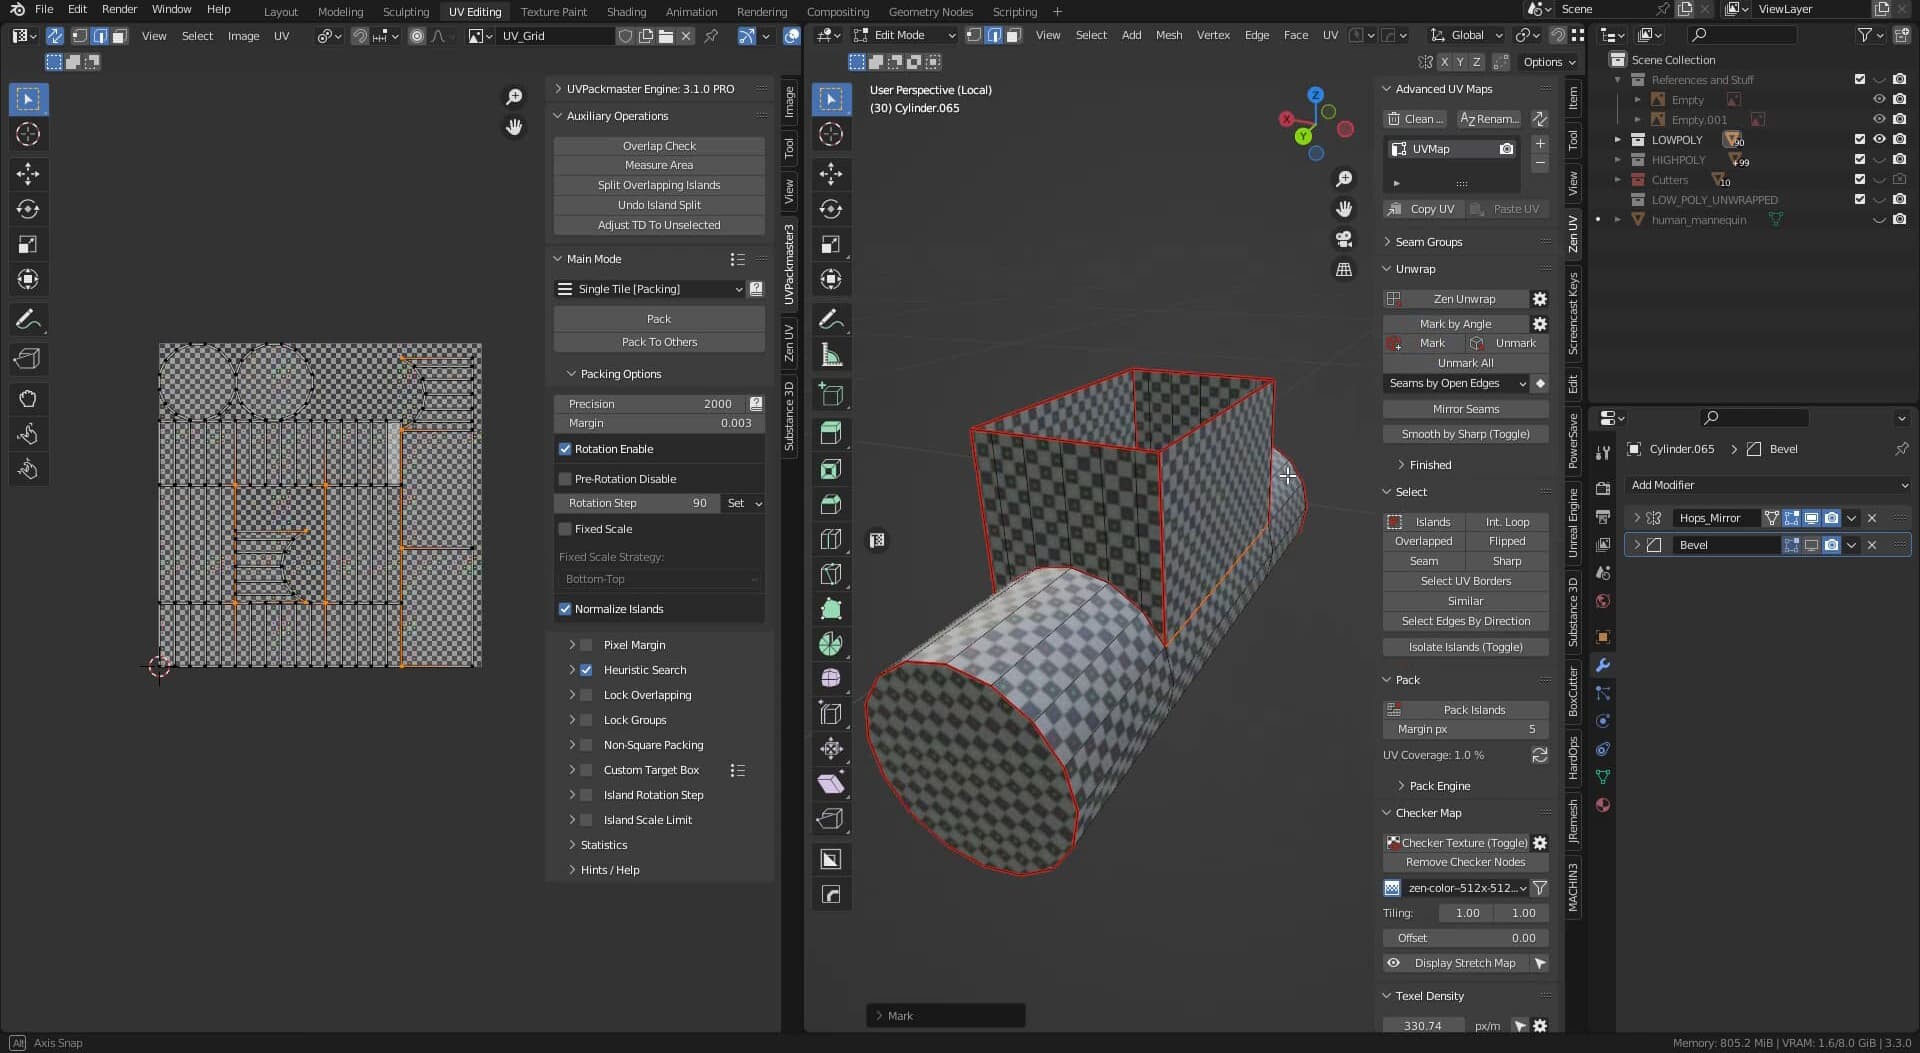
Step 2: UV Unwrapping for Precise Texturing
- Performed meticulous UV mapping to flatten the 3D model accurately onto a 2D surface, essential for high-quality texturing.
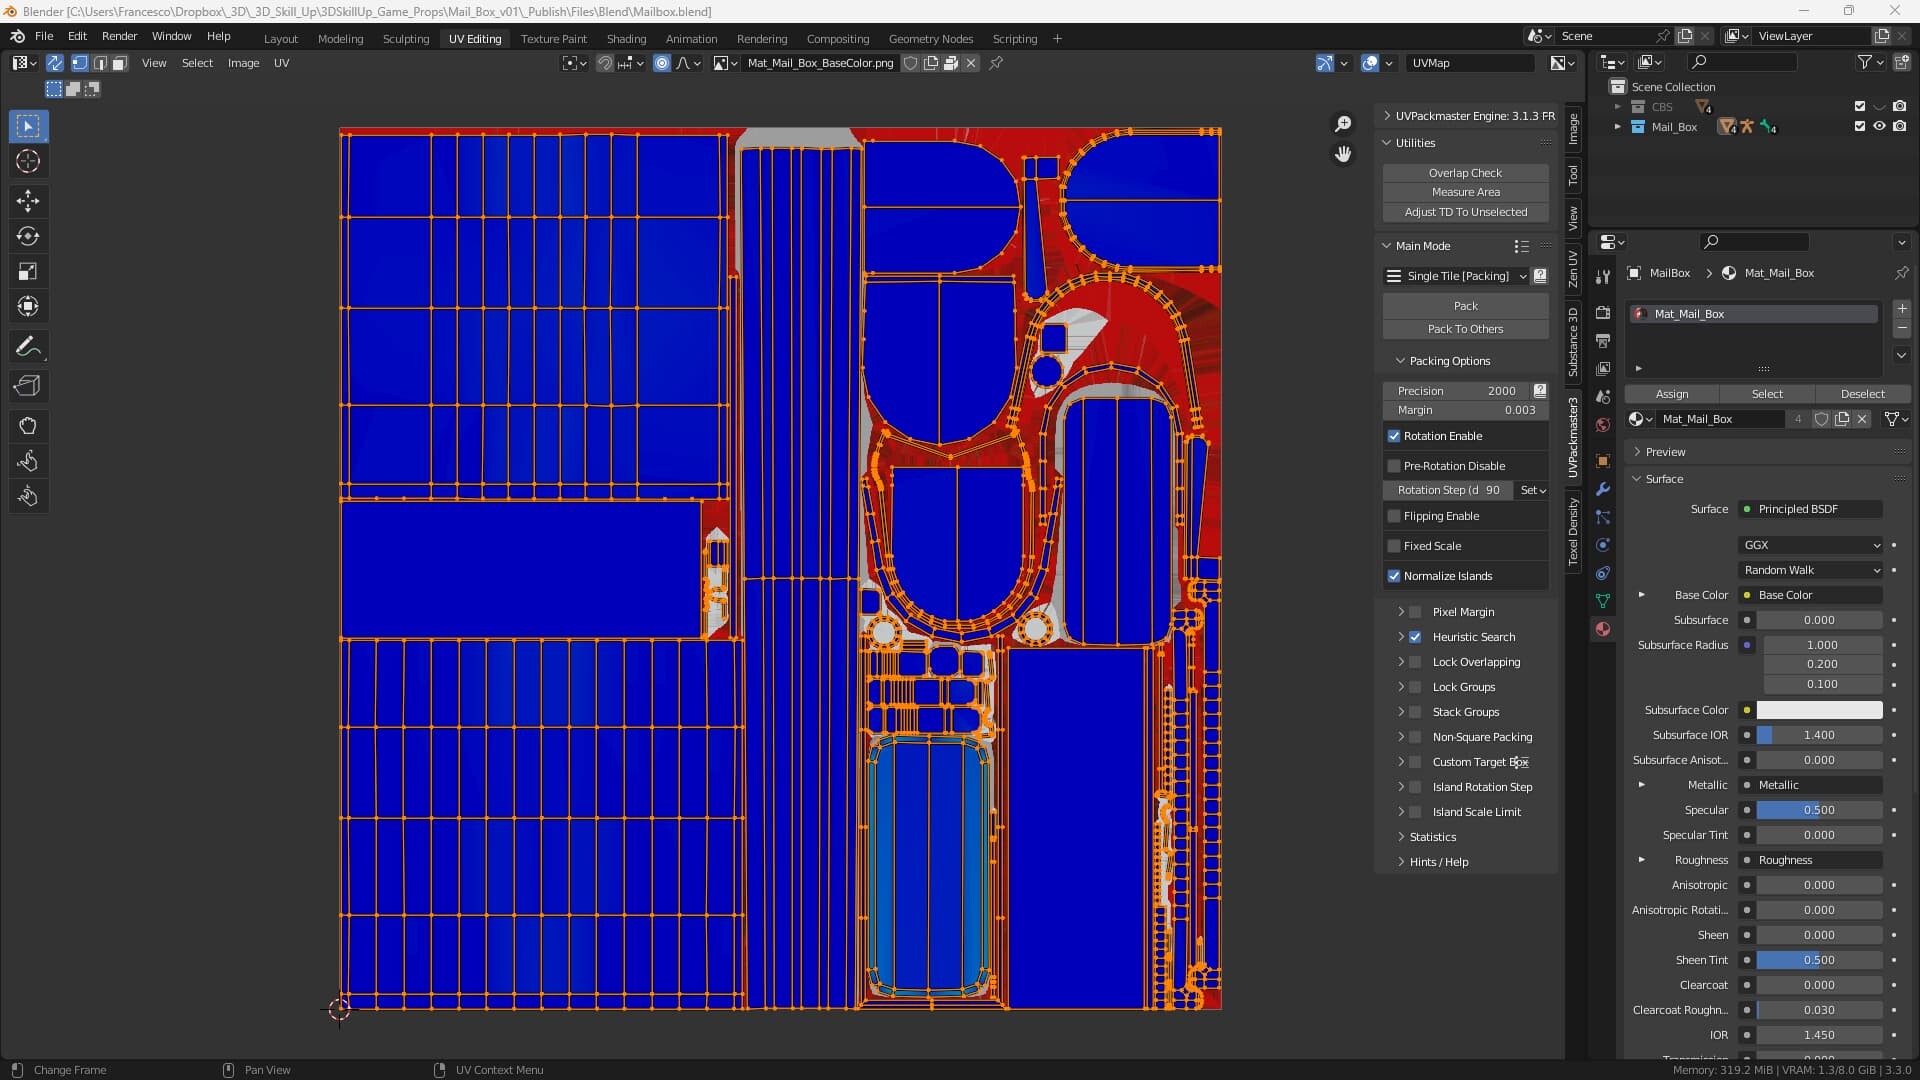
UV map of American Style Mailbox model created in Blender for texture mapping process
The Importance of a Well-Done Unwrap
The unwrapping stage is essential because it lays the foundation for effective texturing. A well-done unwrap will produce a UV map that maximizes texture space, minimizes distortion, and takes into account the visual hierarchy of the model.
By carefully unwrapping our American Style Mailbox 3D Model, we ensured that the texture will accurately follow the shape and details of the model.In the following section, we will take a closer look at the next stage: baking the details onto our model through the use of a normal map.
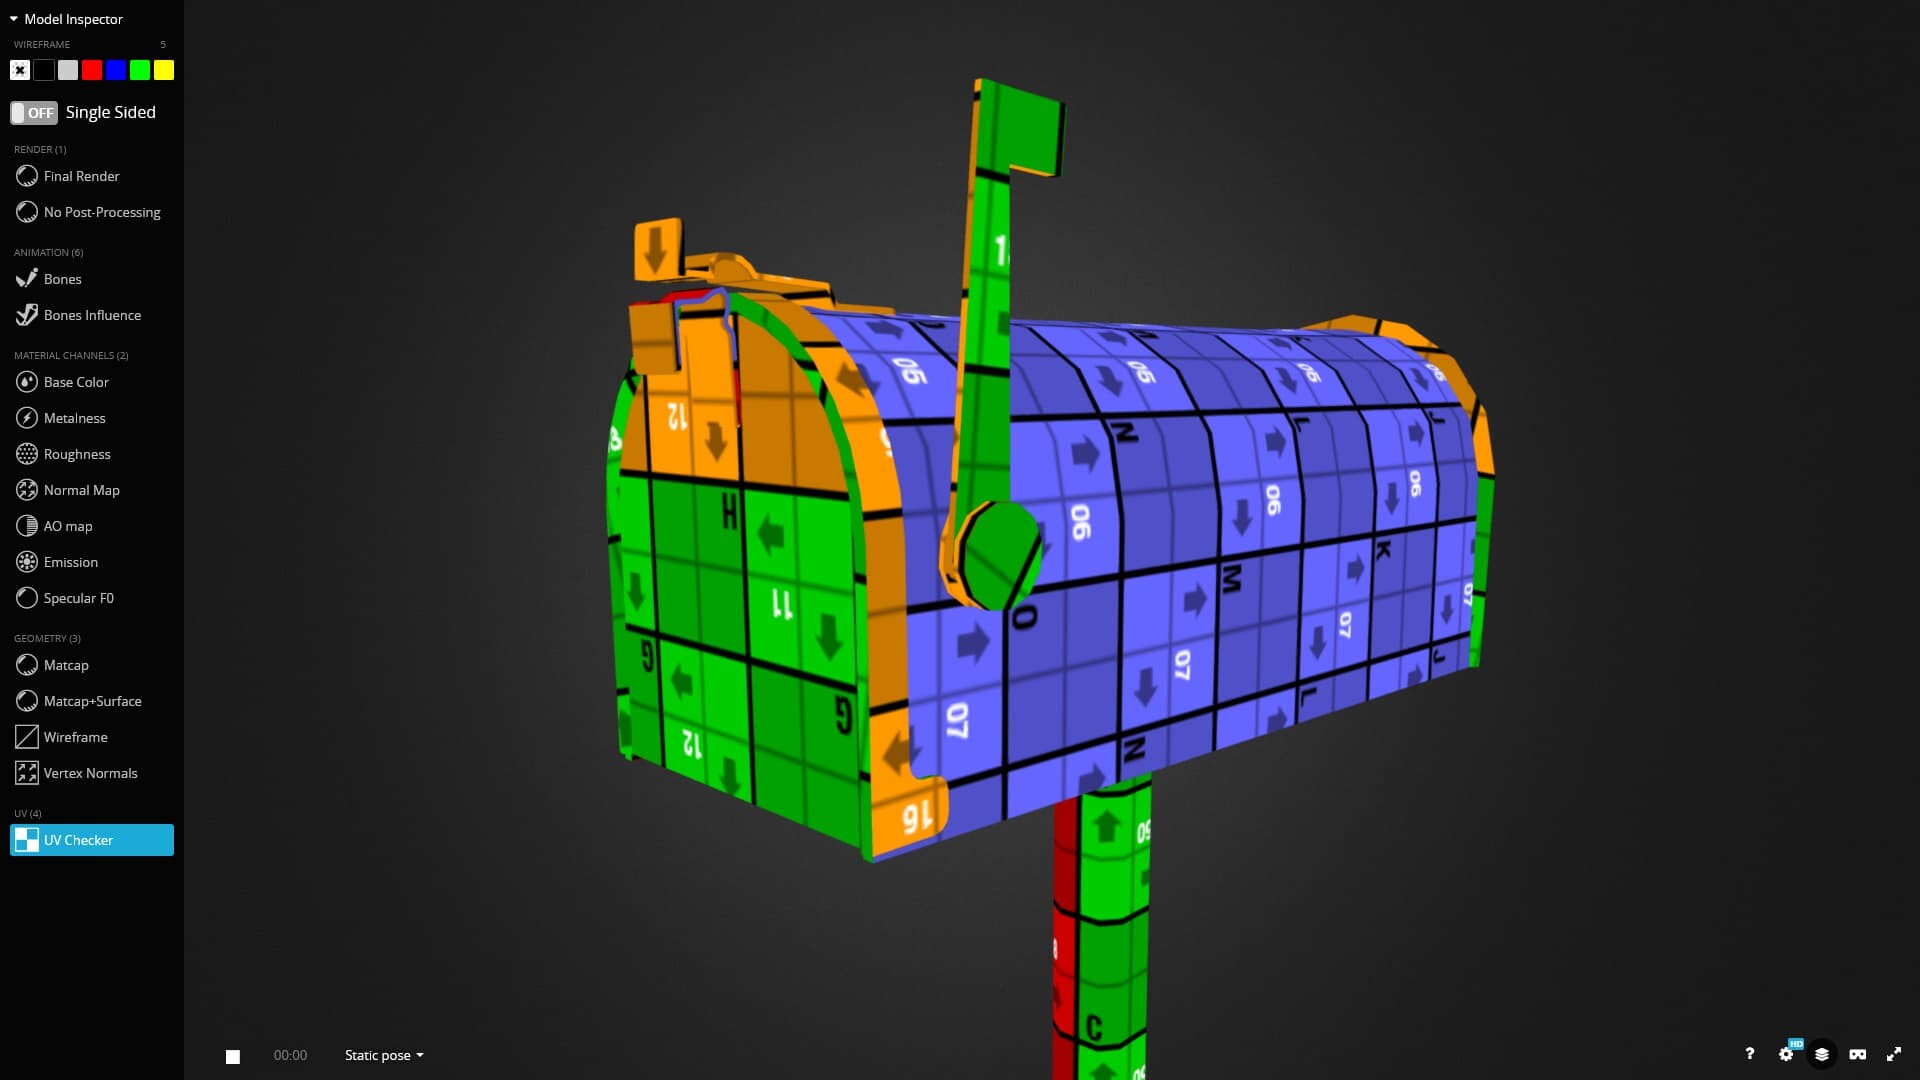
American Style Mailbox model with UVGrid Checker shown in Sketchfab interface
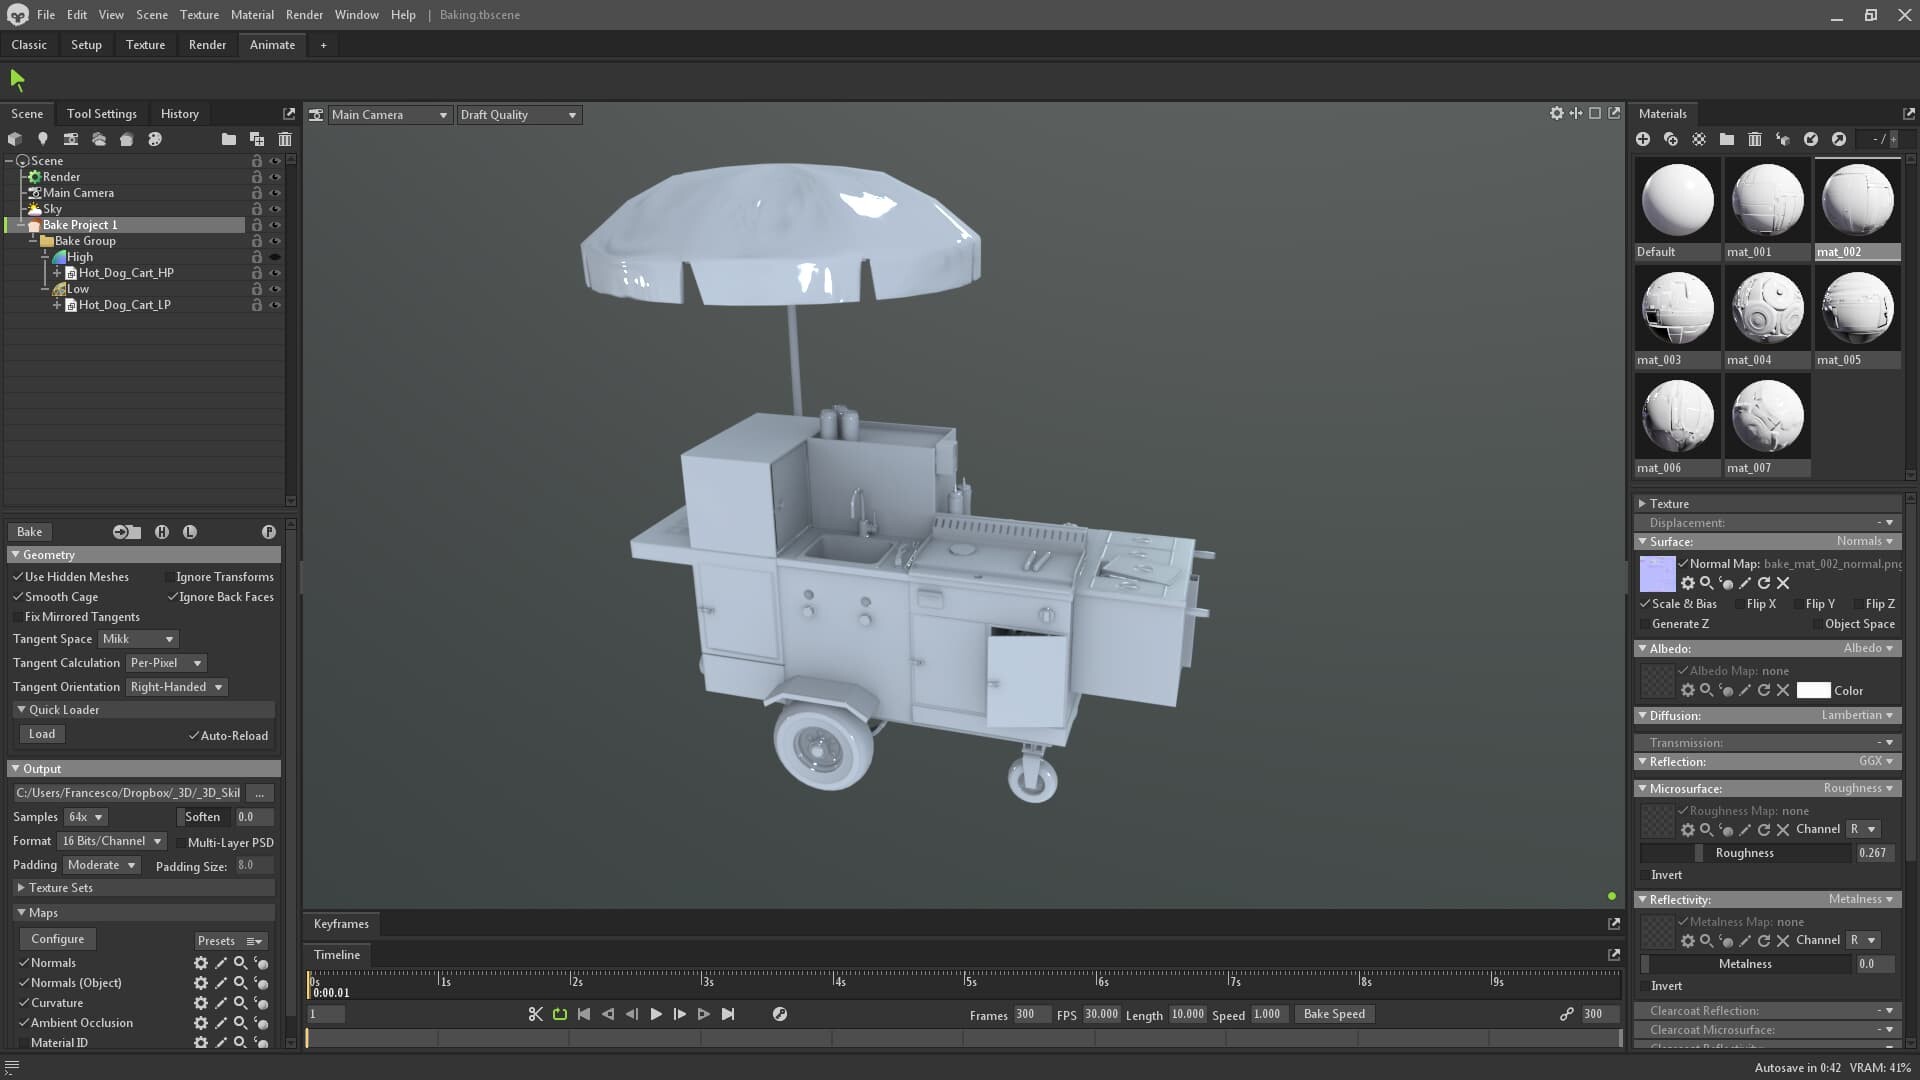
Step 3: Baking Details with Marmoset Toolbag
- Captured high-poly details effectively using Marmoset Toolbag’s advanced projection tools.
- Adjusted settings like offset, skew, and anti-aliasing to achieve optimal results.
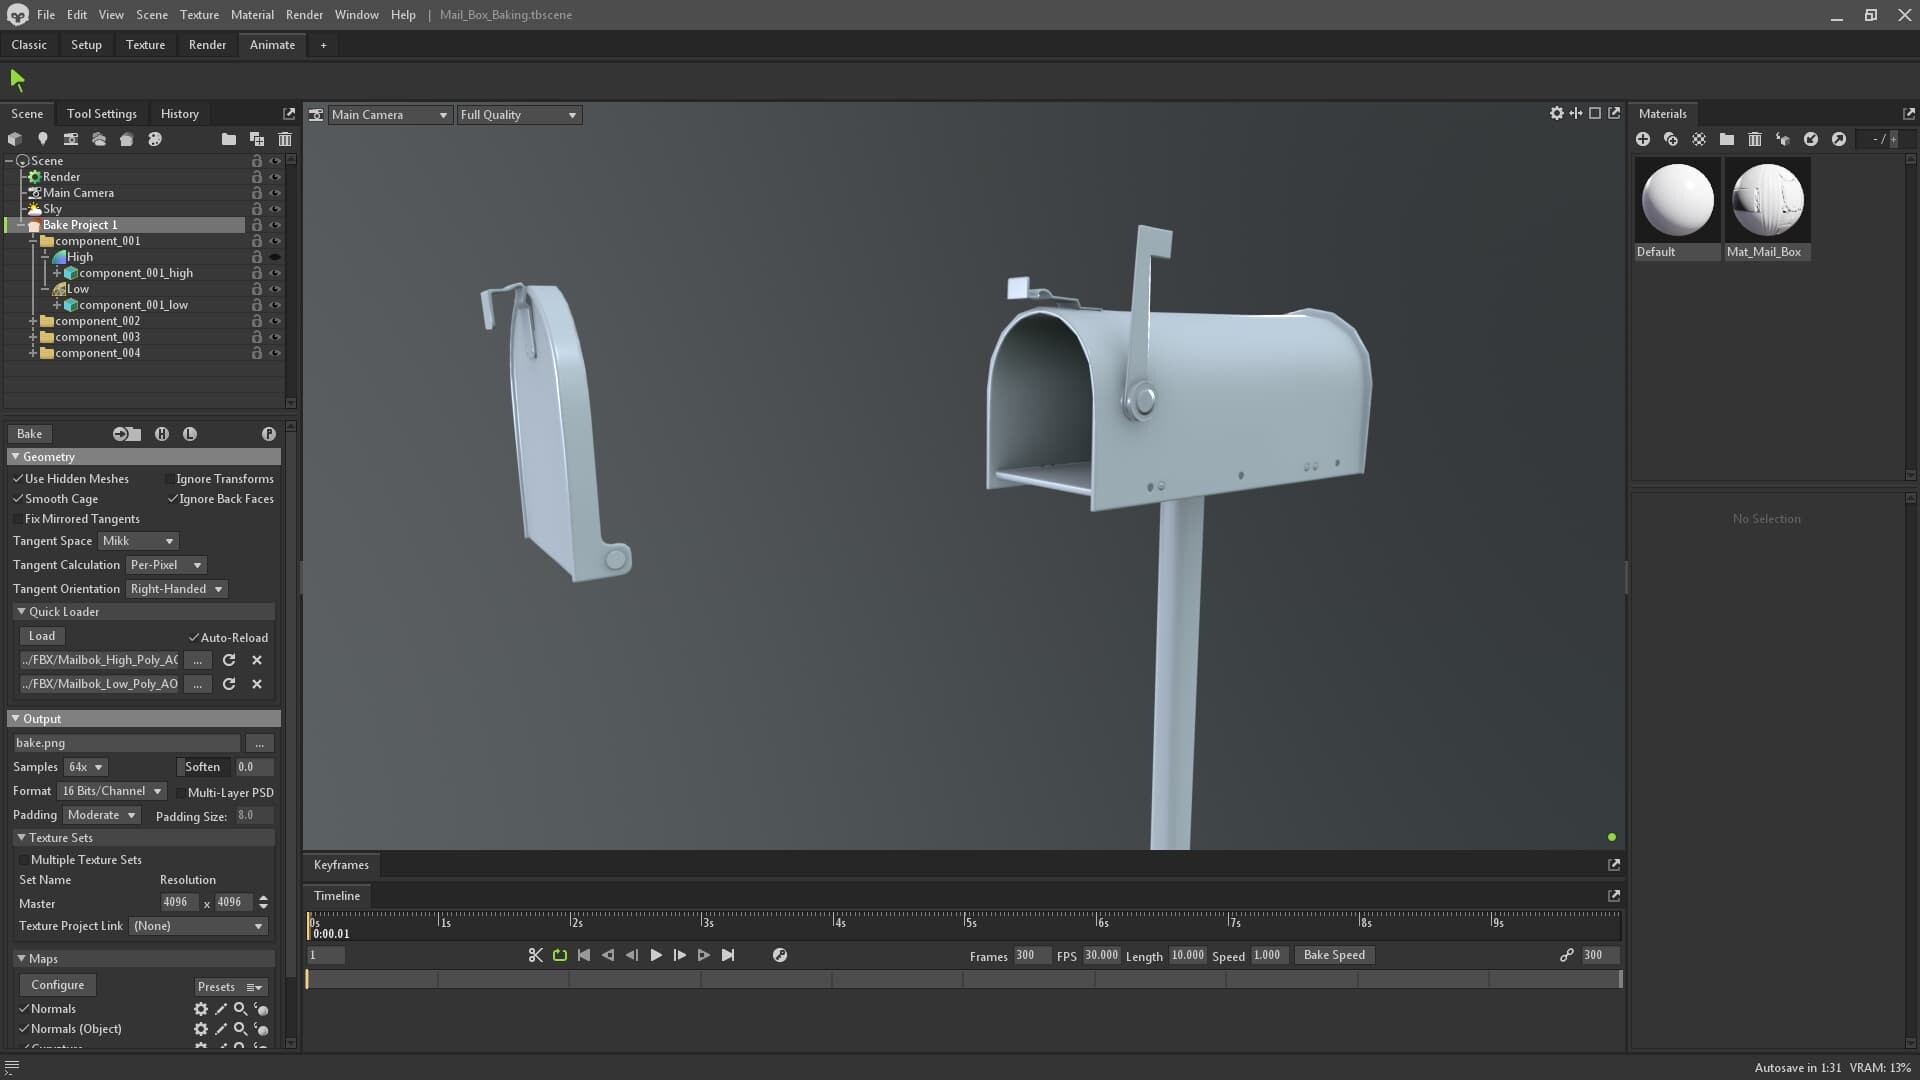
American Style Mailbox model baking process visualized in Marmoset Toolbag interface
Step 4: Texturing with Substance Painter
- Leveraged Substance Painter’s powerful PBR workflow to create realistic materials.
- Added fine details such as rust, scratches, and paint wear to enhance realism.
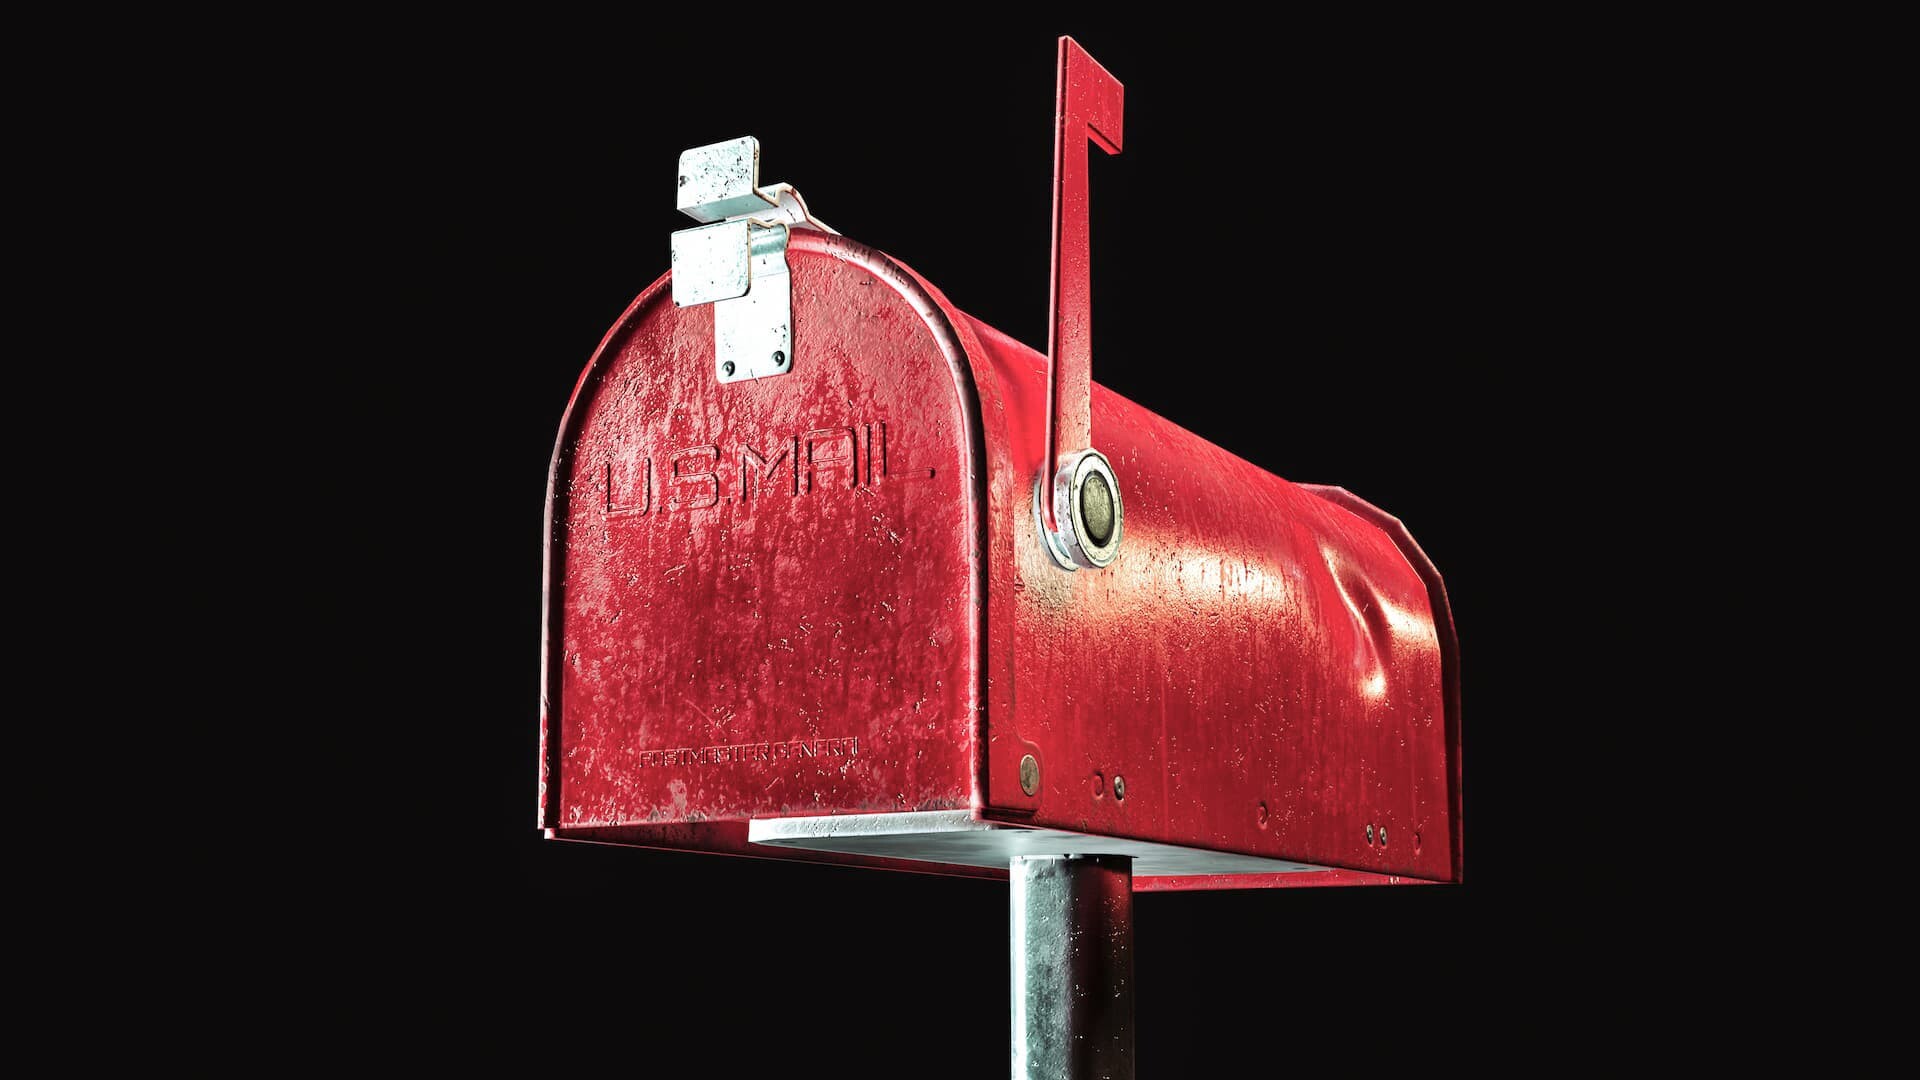
MailBox 3D Model Rendering
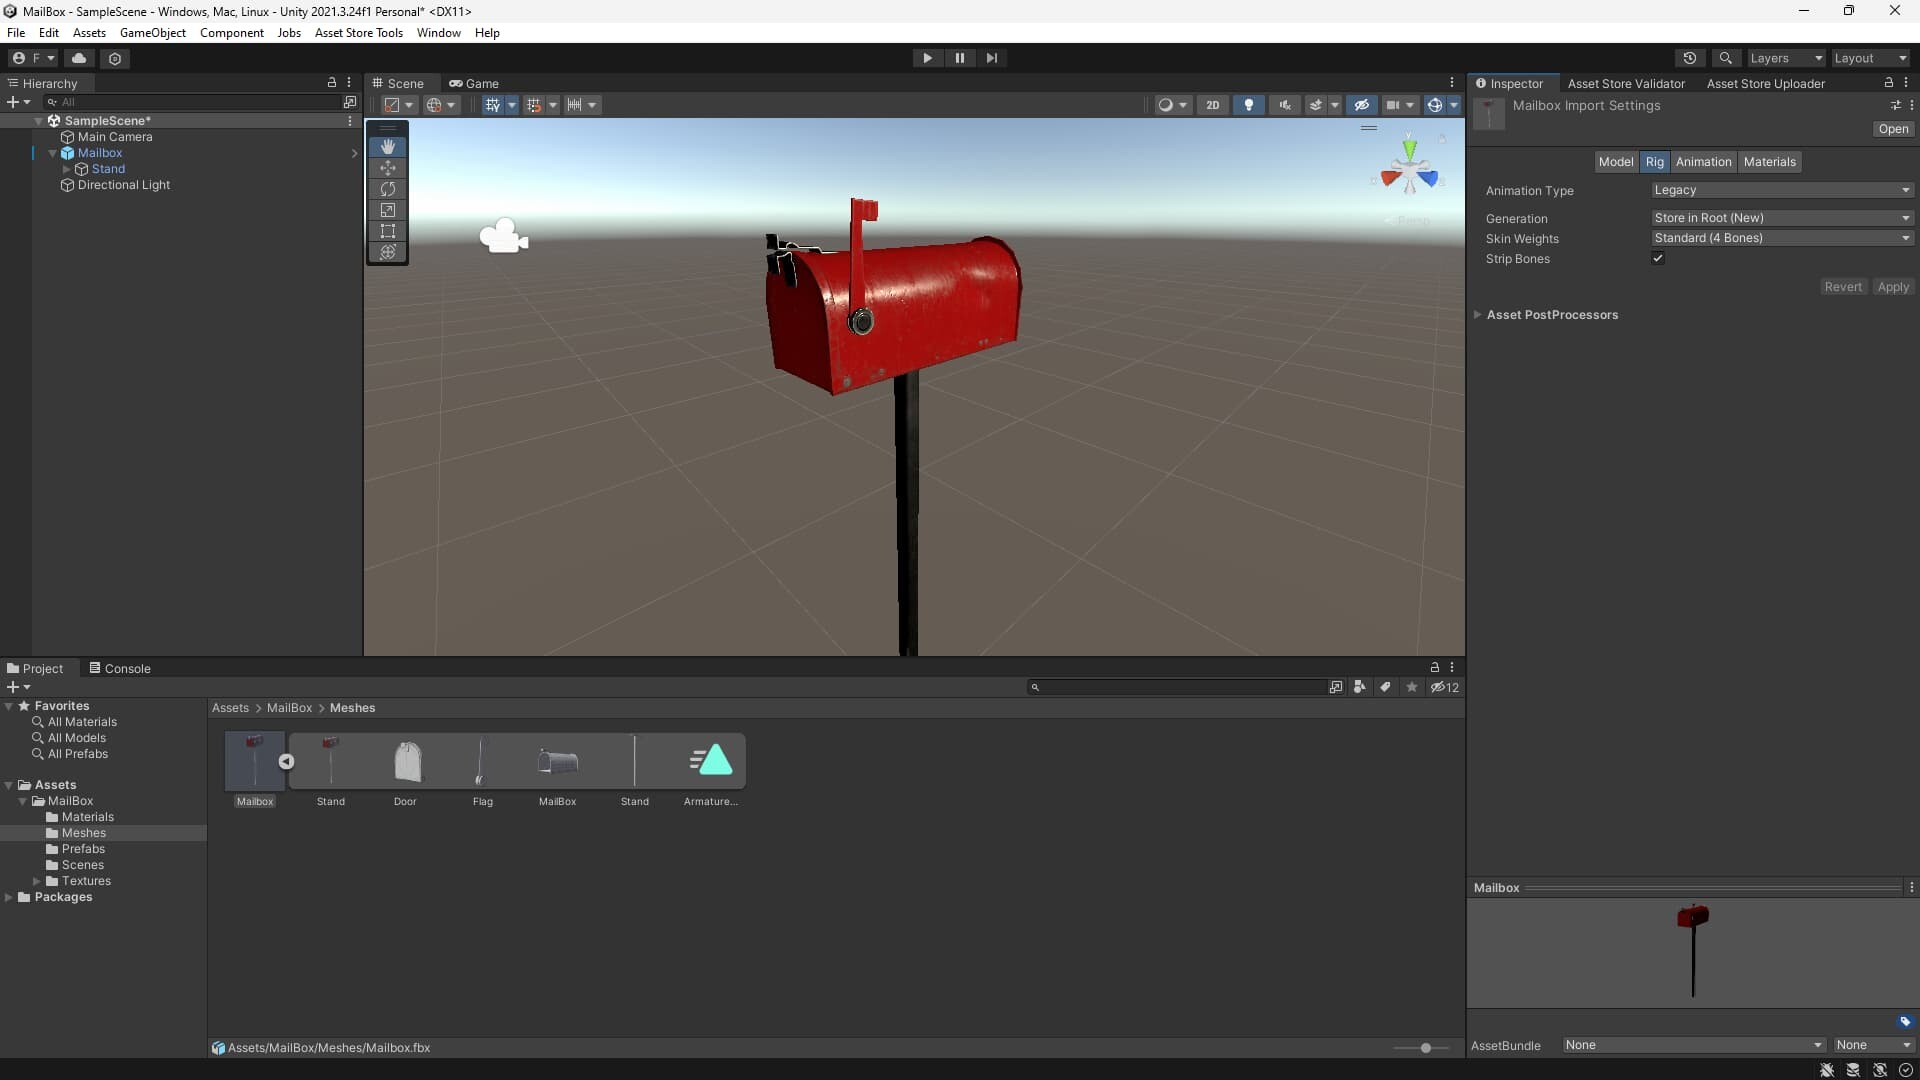
Result: A High-Performance, Realistic, Game-Ready 3D Asset
The optimized American-Style Mailbox is more than visually appealing—it significantly boosts gameplay performance. It reduces loading times, prevents frame rate drops, and ensures smoother experiences even on less powerful hardware. Players can enjoy immersive gameplay free of technical distractions.
Conclusion: Elevate Your Game Projects with Optimized 3D Assets
Optimizing 3D models isn't just beneficial—it's essential. As games become increasingly detailed and immersive, the demand for efficient yet realistic assets grows exponentially. Through the example of my American-Style Mailbox 3D Model, you've seen firsthand how careful optimization techniques like low-poly modeling, baking, and PBR texturing can deliver exceptional visual quality without sacrificing performance.
If you’re ready to enhance your own game or VR/AR projects, I invite you to explore additional optimized assets, including HDRi Maps, PBR Textures, and Game Props, on my Artstation Store or visit my official website at 3dskillup.art.
Stay tuned for more tips, insights, and resources designed to help you create stunning, game-ready 3D content.