In this article we will see how to create LODs with Blender and use them with Unity. LOD stands for Level Of Detail and is an optimization technique to reduce hardware workload by reducing the number of polygons of the meshes that are distant from the camera.
When an object is far from the camera, details will not be seen, but if LODs are not used, the GPU will still calculate the number of polygons in the distant mesh thus leading to unnecessary workload and impacting the performance of the scene. But thanks to the LODs technique the polygons will be reduced so that optimal performance will be achieved in real-time rendering.
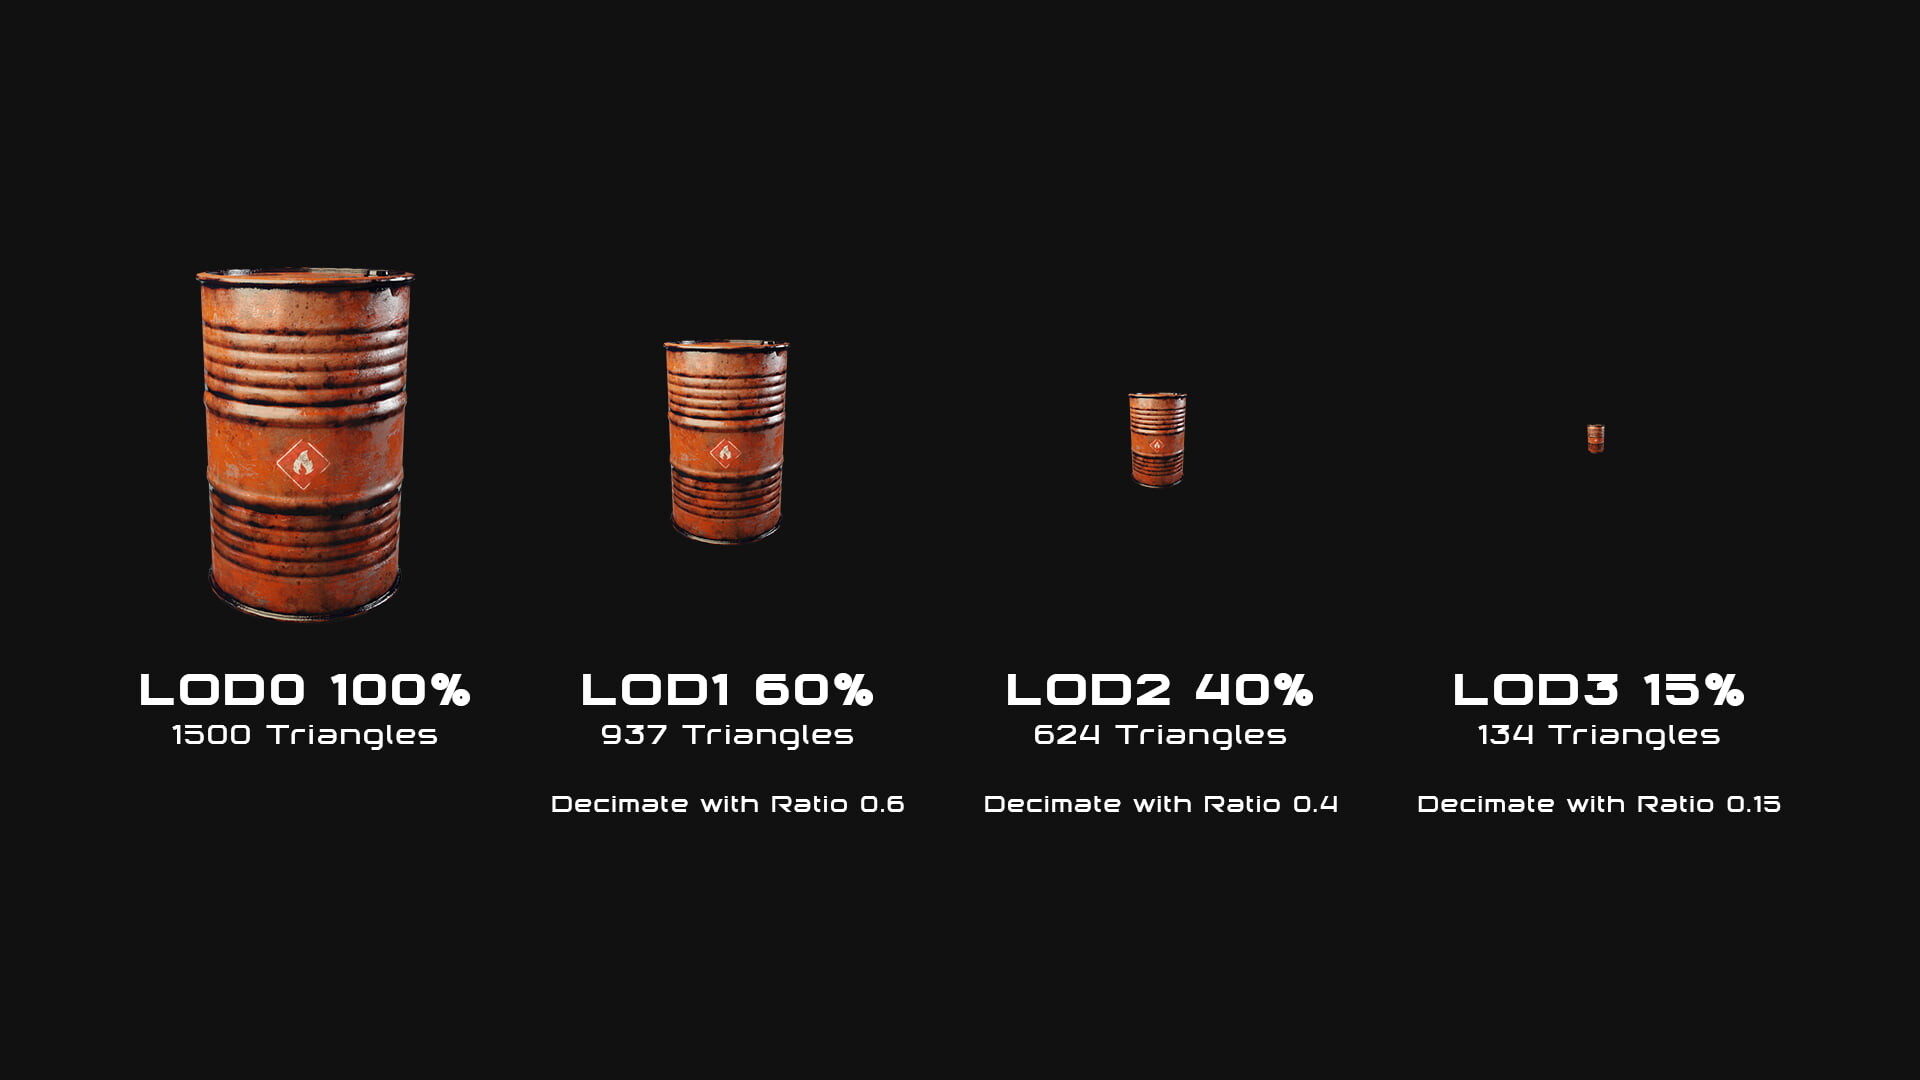
By name convention you assign LOD0 to the original mesh and then increase the number by reducing the geometry.
Let’s create LODs with Blender!

We can create LODs by reducing the geometry manually or through the use of a modifier, in this case Blender’s Decimate modifier. It’s useful to reduce geometry manually when we need to maintain a clean topology, such as for characters, organic shapes or anything that needs to be deformed or animated. Instead, for static objects, like game props, we can make use of decimation modifiers.
✔️ To create LOD1 we make a copy of LOD0 with Shift+D
✔️ We add the Decimate modifier and set the ratio value to 0.6
✔️ We add the Weighted Normal modifier if shading artifacts occur
Then we repeat the same process for LOD2 and LOD3. We duplicate LOD0 and create LOD2 by add the decimate modifier with ratio 0.4 and LOD3 with the decimate modifier and ratio 0.15
How to use LODs with Unity
At this point you can export to FBX format our LODs and use them with Unity.
We organize the Unity project with all the necessary folders. In particular, the Textures, Meshes (containing the imported LODs in fbx format), Materials folder and Prefabs folder were created.
The textures folder contains the textures with the 4K, 2K, 1k and 512 dimensions that will be used with the LODs. The LOD0 will have the material with 4K textures loaded, the LOD1 at 2K and so on.
✔️ We move LOD0, LOD1, LOD2 and LOD3 to the hierarchy panel of Unity.
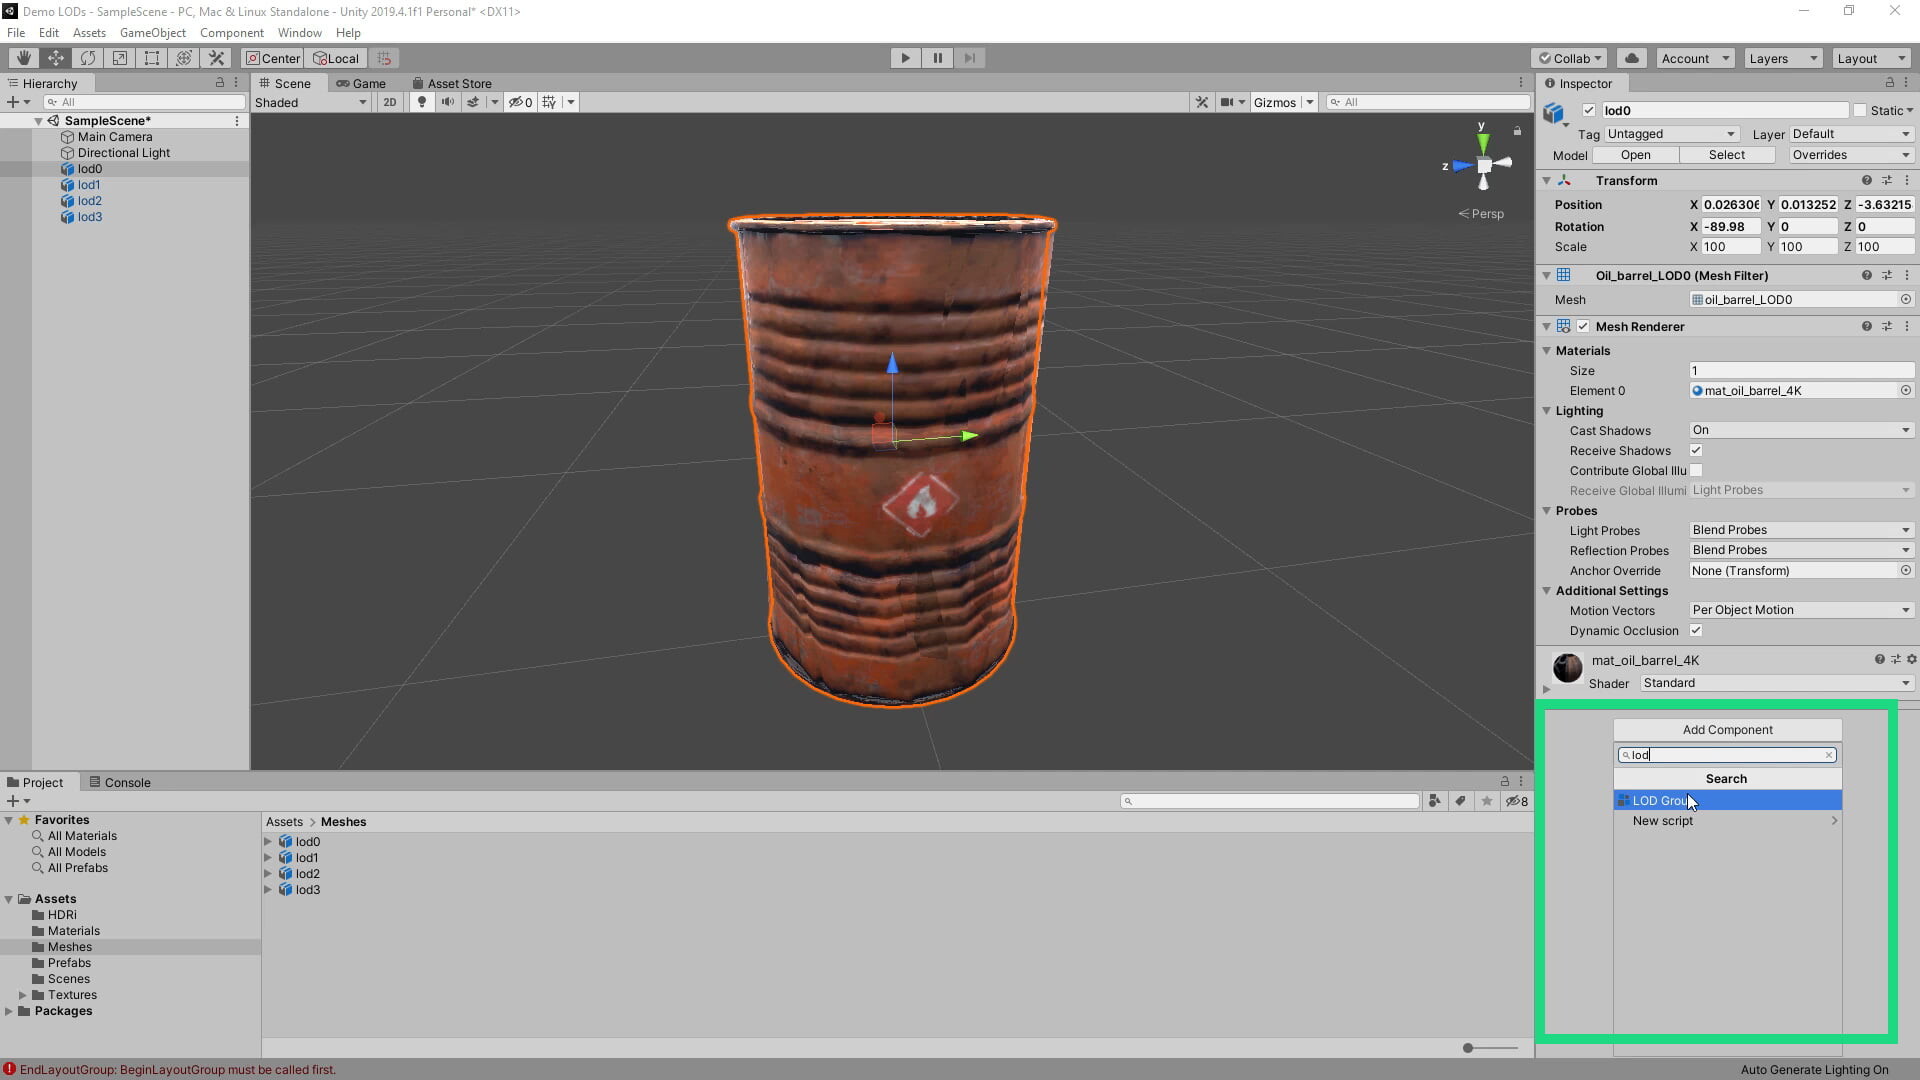
✔️ Then we select LOD0 from the hierarchy and add a LOD Group component from the Inspector panel.
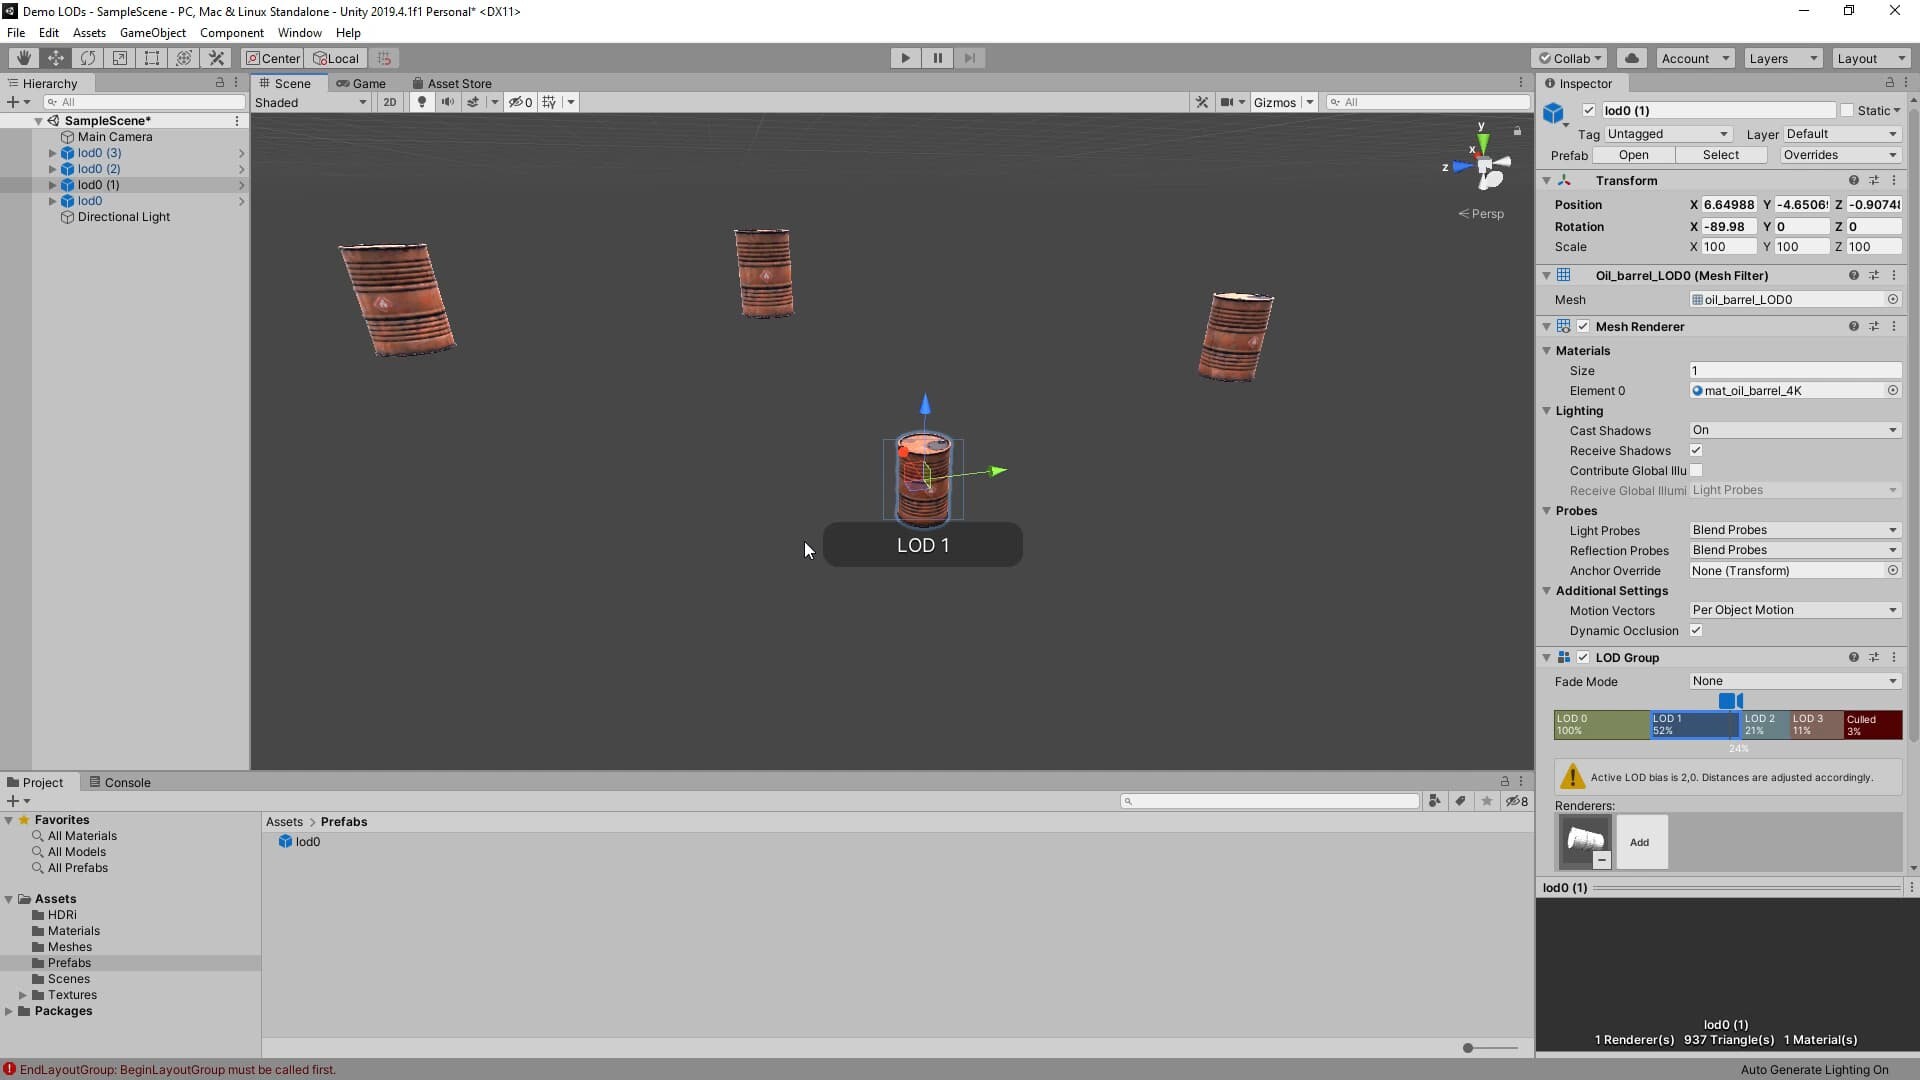
✔️ Now we have to select the respective slots named LOD0, LOD1 etc. (to add a new slot right-click on them and Insert Before) click on the add button and add the corresponding LODs present in the hierarchy we created with Blender.
We can then drag our lod0 into the prefabs folder to create a prefab that we can easily reuse in the scene with the loaded LOD Group.
In this article we looked at How to create LODs with Blender and use them with Unity
So that’s it as far as creating LODs with Blender is concerned. Stay tuned for new posts!
You can follow me on 🔥 Artstation and 🔥 Artstation Marketplace
Video Youtube (Audio in Italian with English subtitles)