🍷 Create a Realistic Wine Glass with Blender!

Hi ArtStation dudes! I'm Francesco Saviano from 3D Skill Up. Today we're going to see how to create a realistic wine glass with Blender.
Almost everything around us in real life can be traced back to simpler, more primitive shapes like cubes, cylinders, spheres, etc. With this principle in mind we can begin to model starting from simple shapes and then arrive at increasingly complex and detailed forms. This phase is known as blockout.
🖼️Let's start with a reference
Although in this case a glass is a very simple shape, it is always a good idea to start modeling with a reference image in the background or in front of us. In this way we won't have problems with proportions and our 3d models will be more realistic.
In Blender we insert an image in the background adding it from the menu add -> image -> reference (shift+a shortcut)
Let's start modeling the wine glass!
Once we have inserted the image in the background we can start modeling the wine glass. We start with a cylinder, enter edit mode (tab key to switch from edit mode to object mode) scale on z, place it at the base and then extrude and scale following the profile of the glass in the image. We then remove the top face.
Let's add modifiers!
At this point we can add the modifiers:
✔️Solidify
✔️Subdivision Surface
Solidify will give thickness to the wine glass while subdivision surface will give it a better shape by subdividing the mesh..
Remember to apply the shade smooth in object mode by clicking with the right mouse button -> shade smooth.
We then place some edge loops (ctrl+r) to give the appropriate shape to the glass.
Then let's create the liquid part for the wine.
We must apply the Solidify modifier, in the modifiers stack select it and use the shortcut Ctrl+a to apply it
To create the liquid part that will represent our wine, we select in edit mode the inside of the glass up to a certain height, duplicate the selection and separate it creating a new piece.
In Edit Mode, once selected the faces we are interested in, we duplicate them with Shift+D and then separate them pressing p->Separate Selection
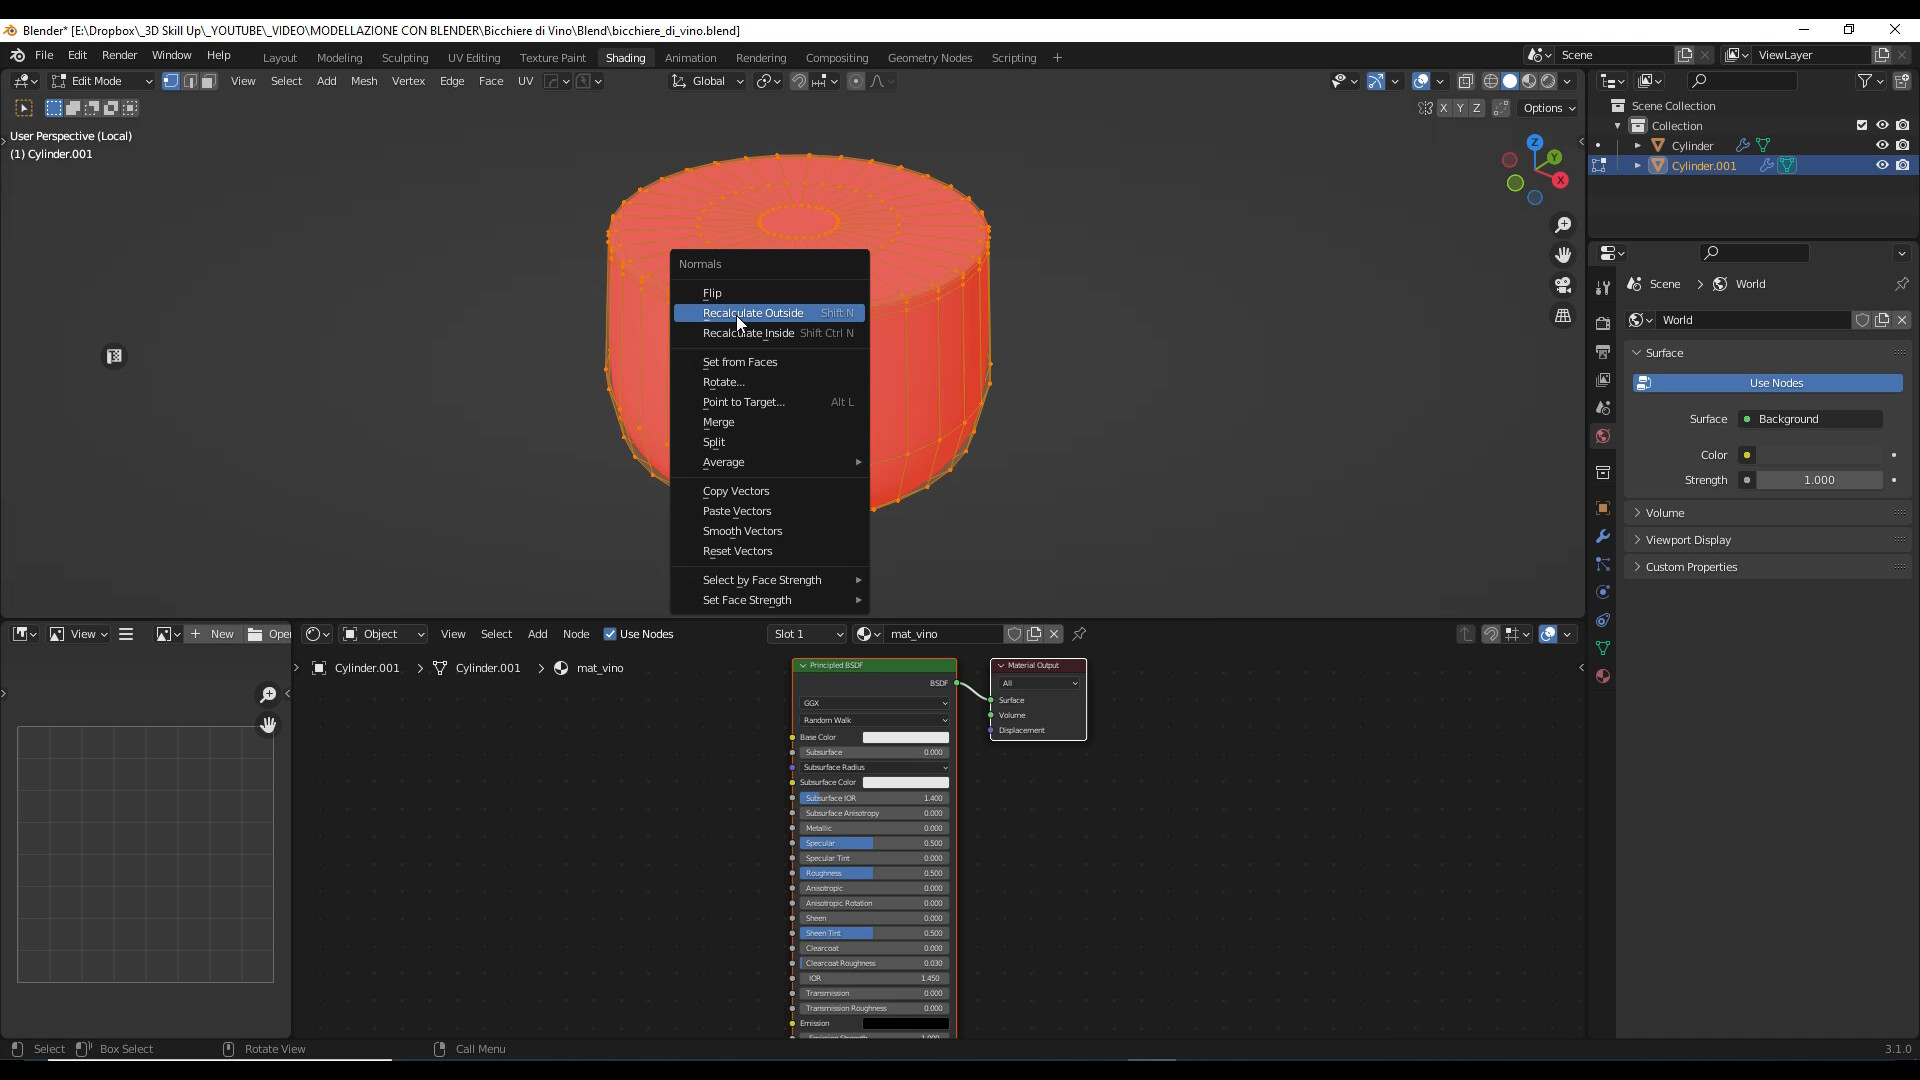
Now let's recalculate the liquid normals. Just select the whole piece in edit mode by pressing the a key (select all). Then press alt+n to open the Normals menu and recalculate the normals.
🔥 It's time to create your glass and wine materials!
Glass Material
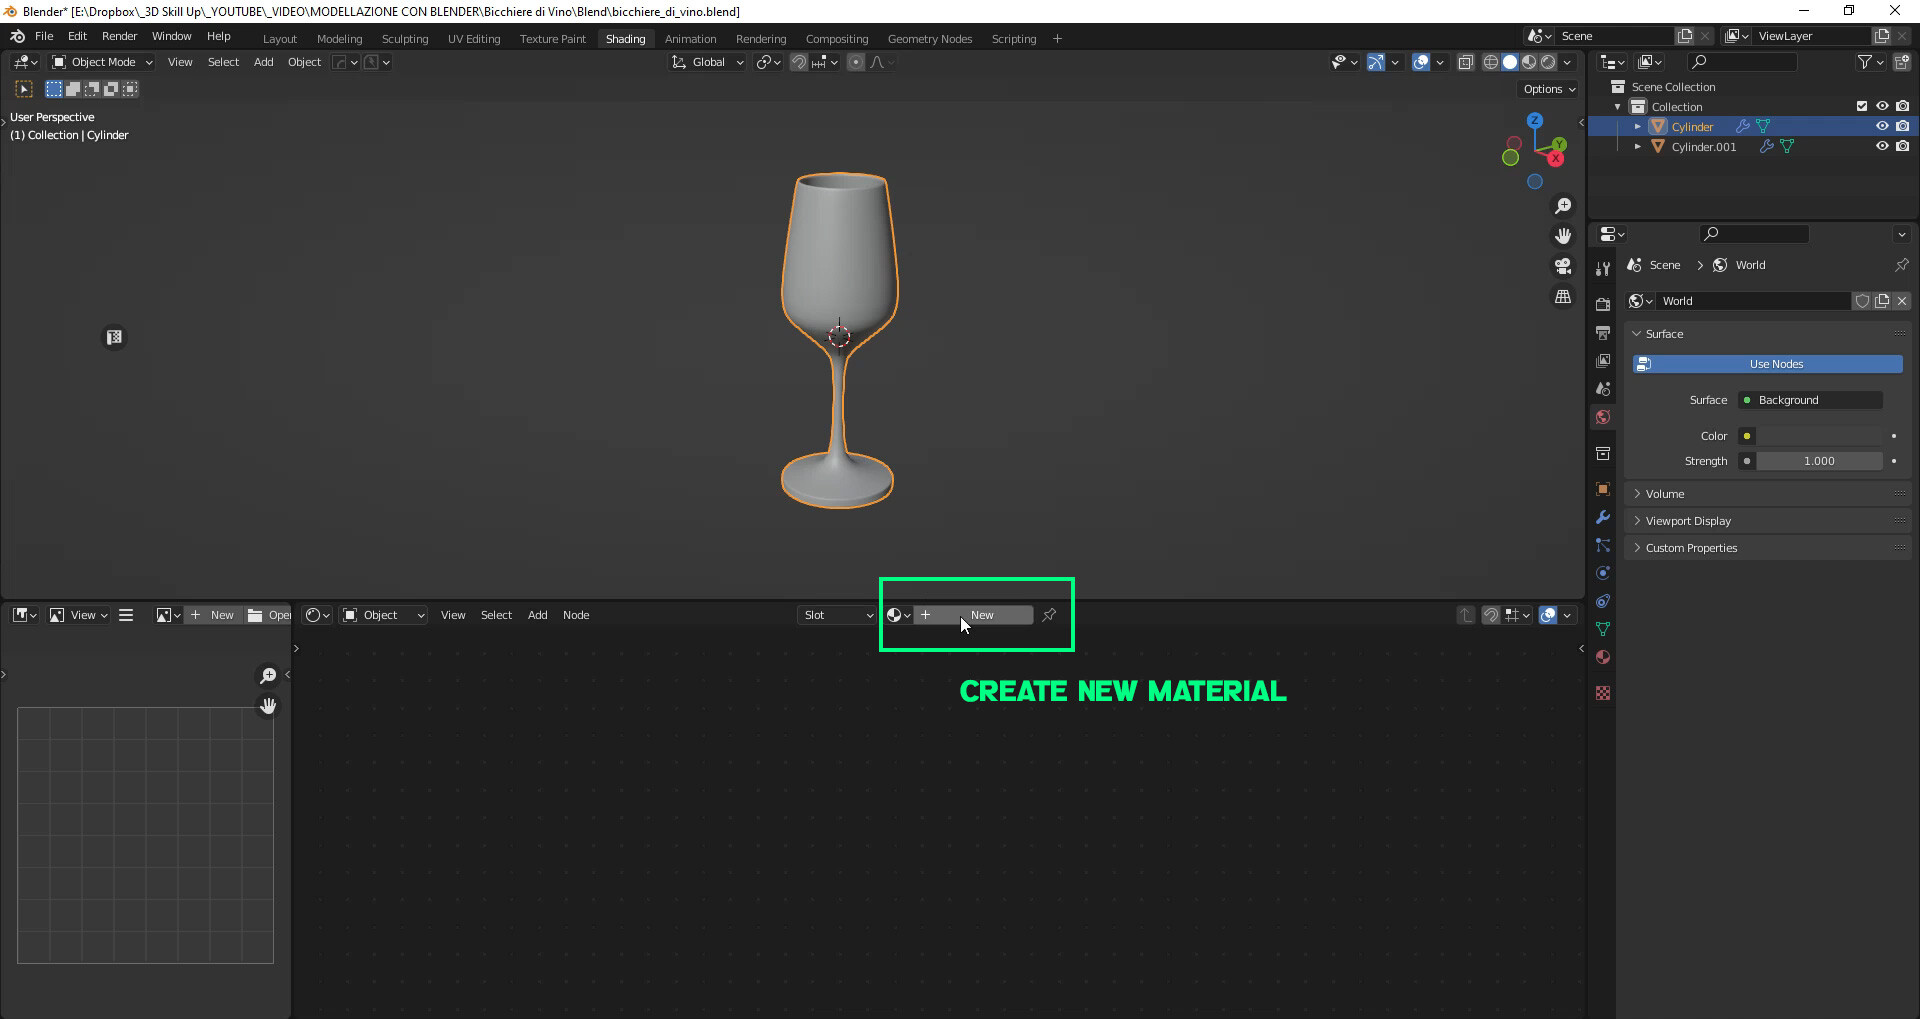
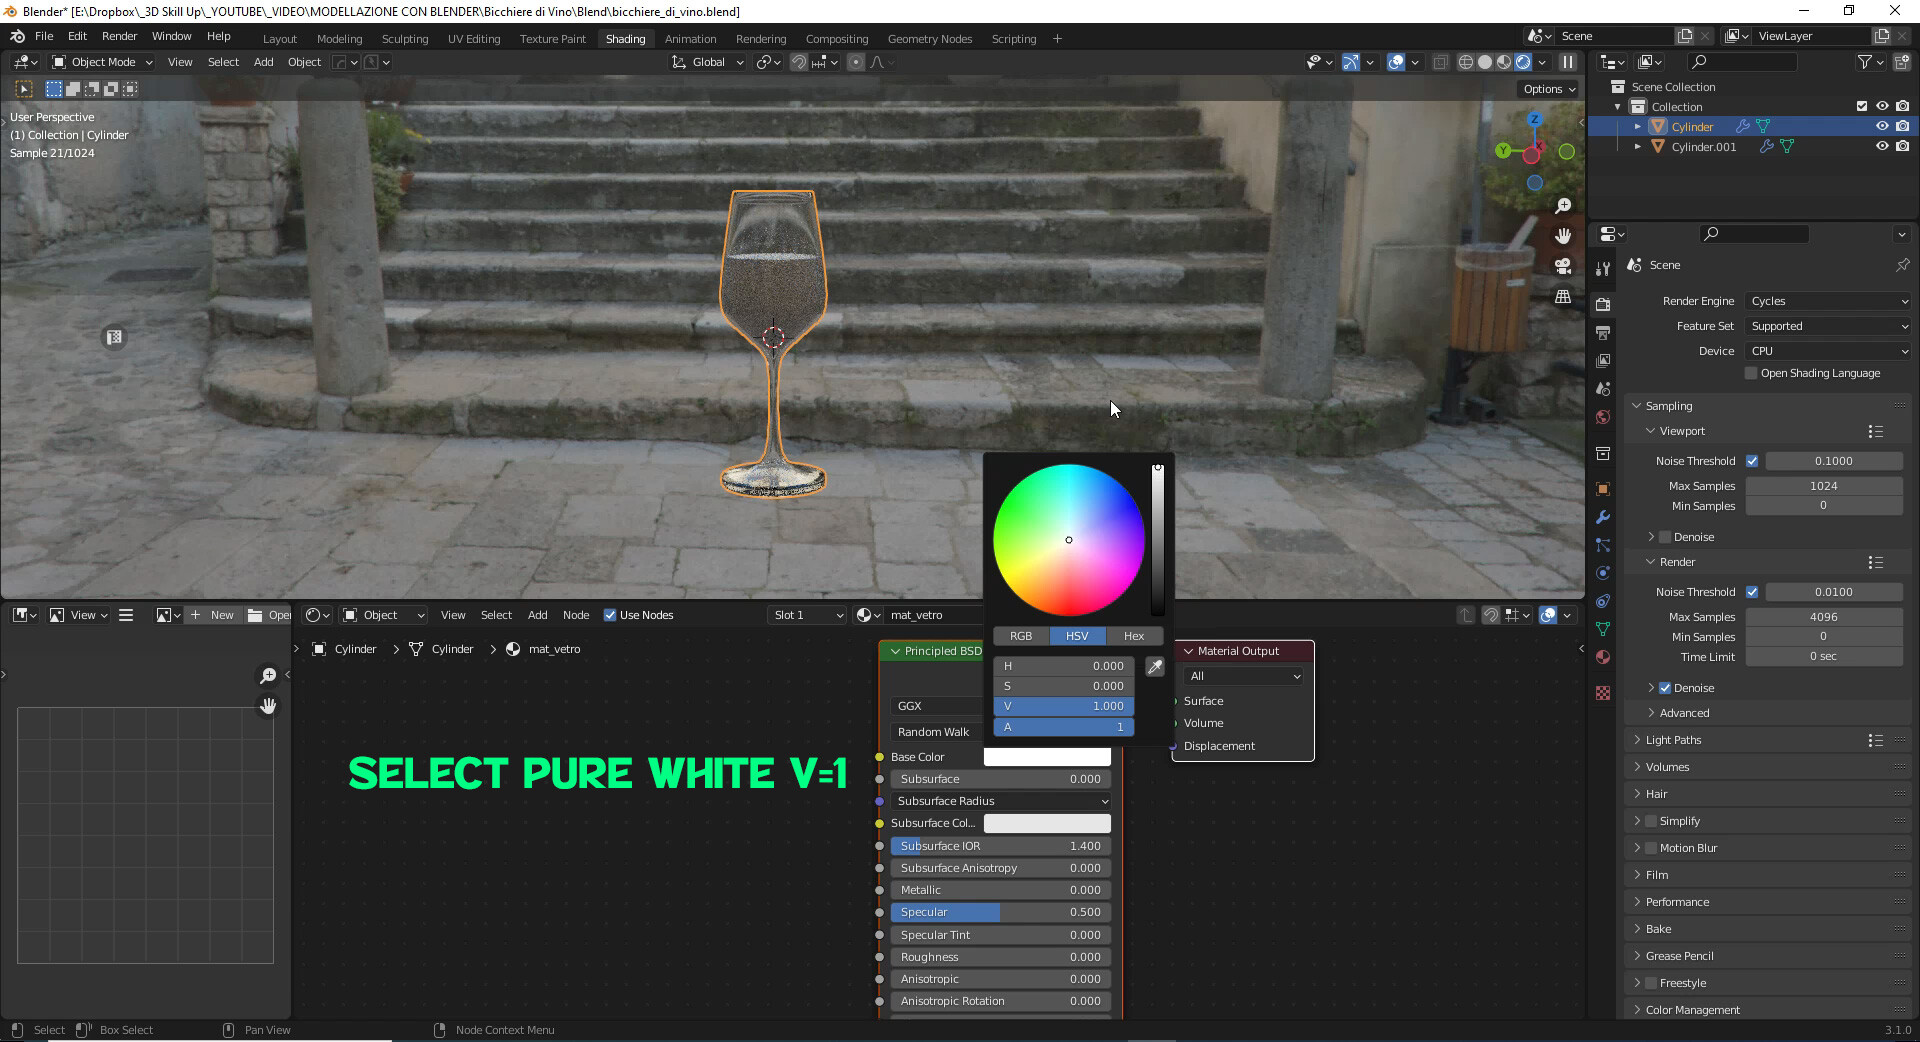
To create the glass we will use the PBR Principled BSDF shader of Blender, in this way we will have a physically correct material. Let's move to the Shading workspace, select the glass in Object Mode and create a new material. I called it mat_glass.
In the Principled BSDF Node we set:
✔️ Transmission to 1
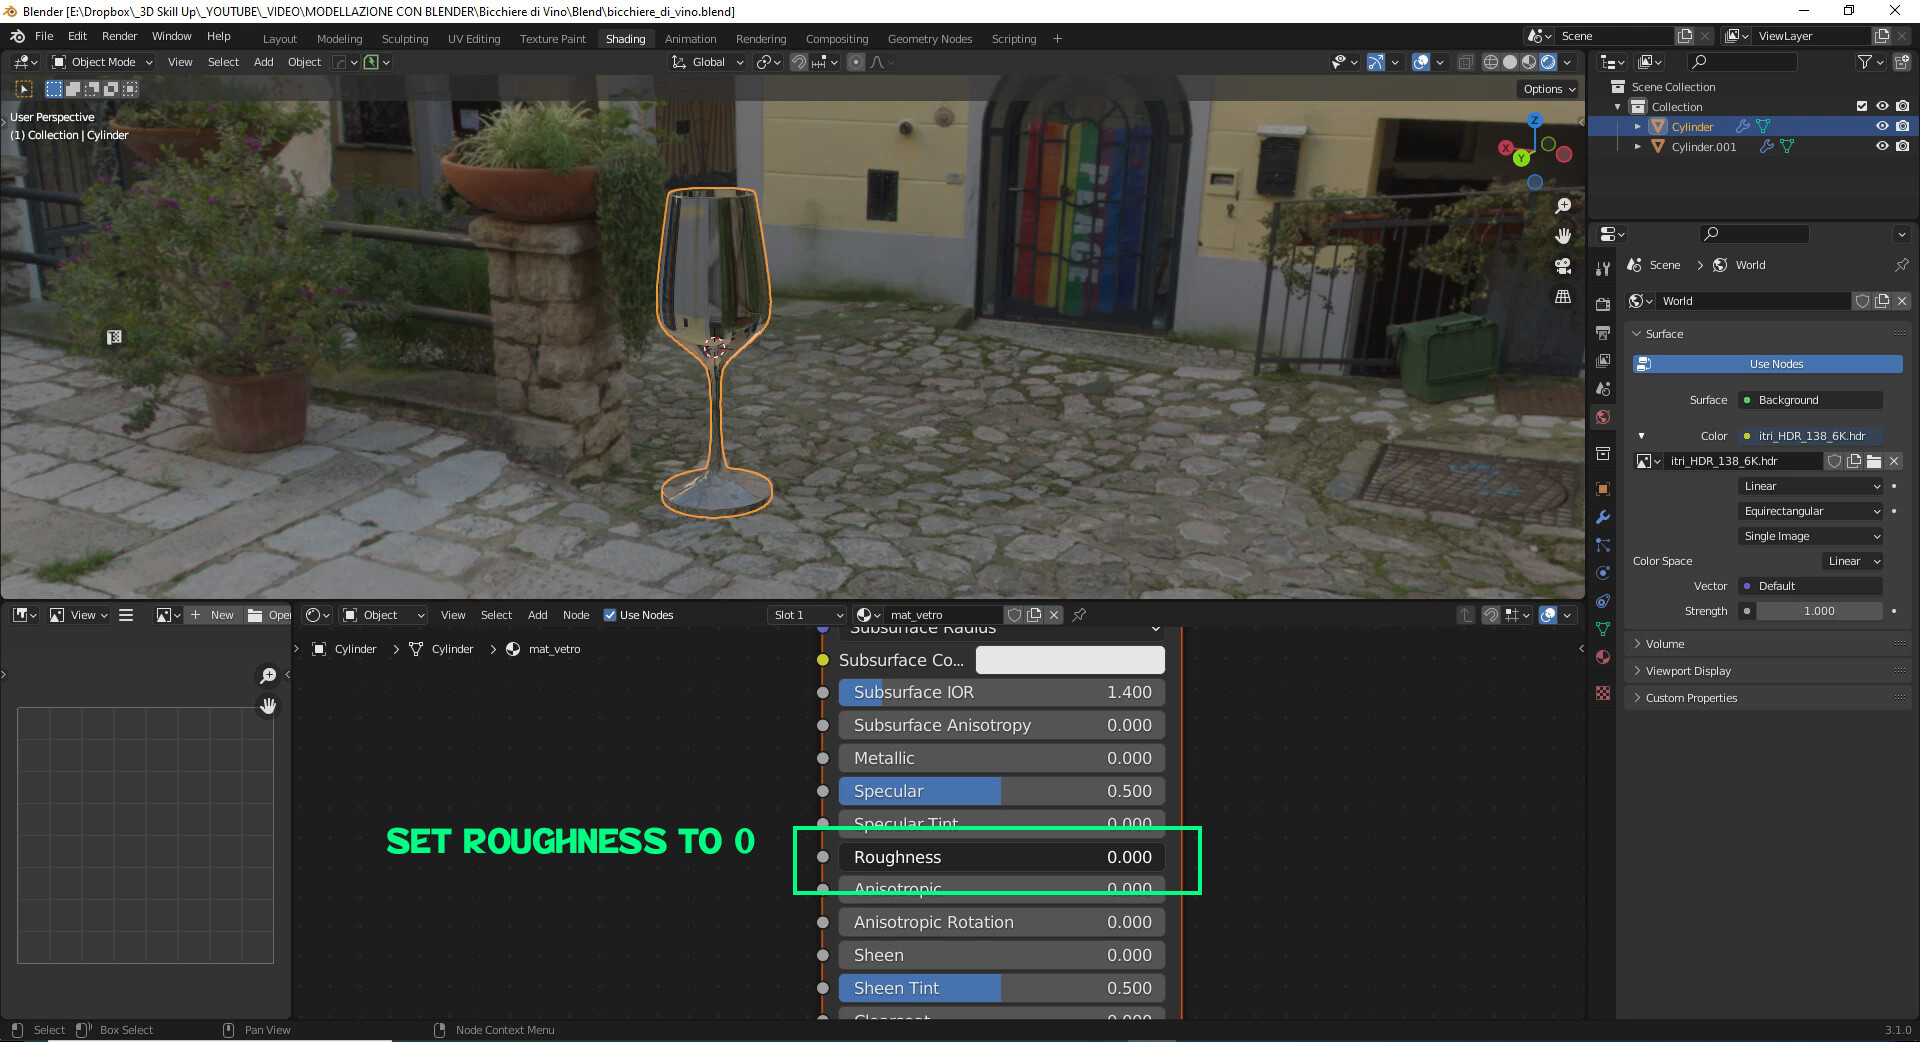
✔️ Roughness to 0
✔️ Base Color to pure white.
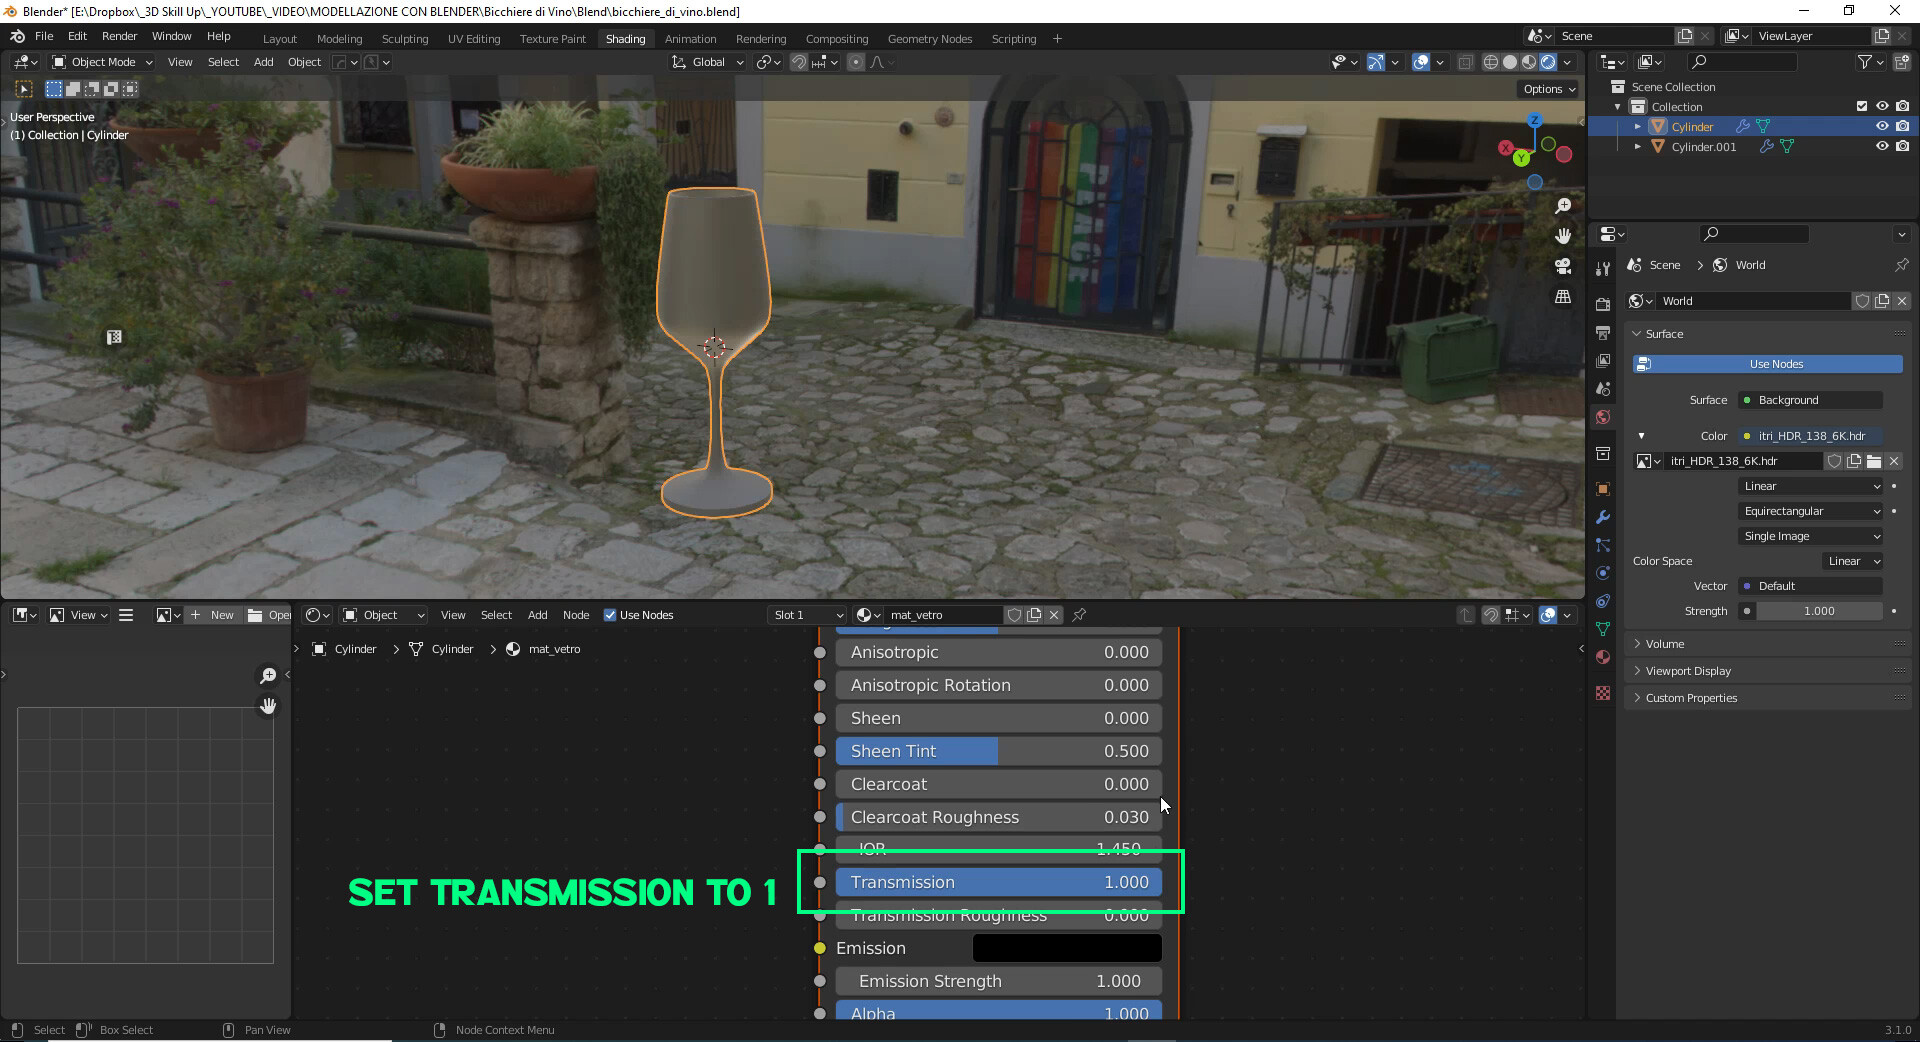
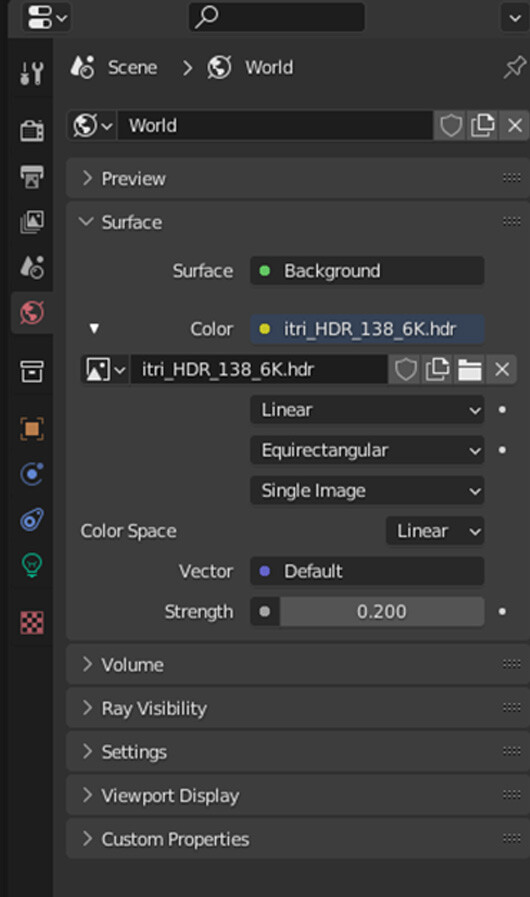
In Blender Properties, in the World Properties tab, load an HDRi by selecting in Color->Environment Texture. Also remember to change the rendering engine from Eevee to Cycles if it is not already set.
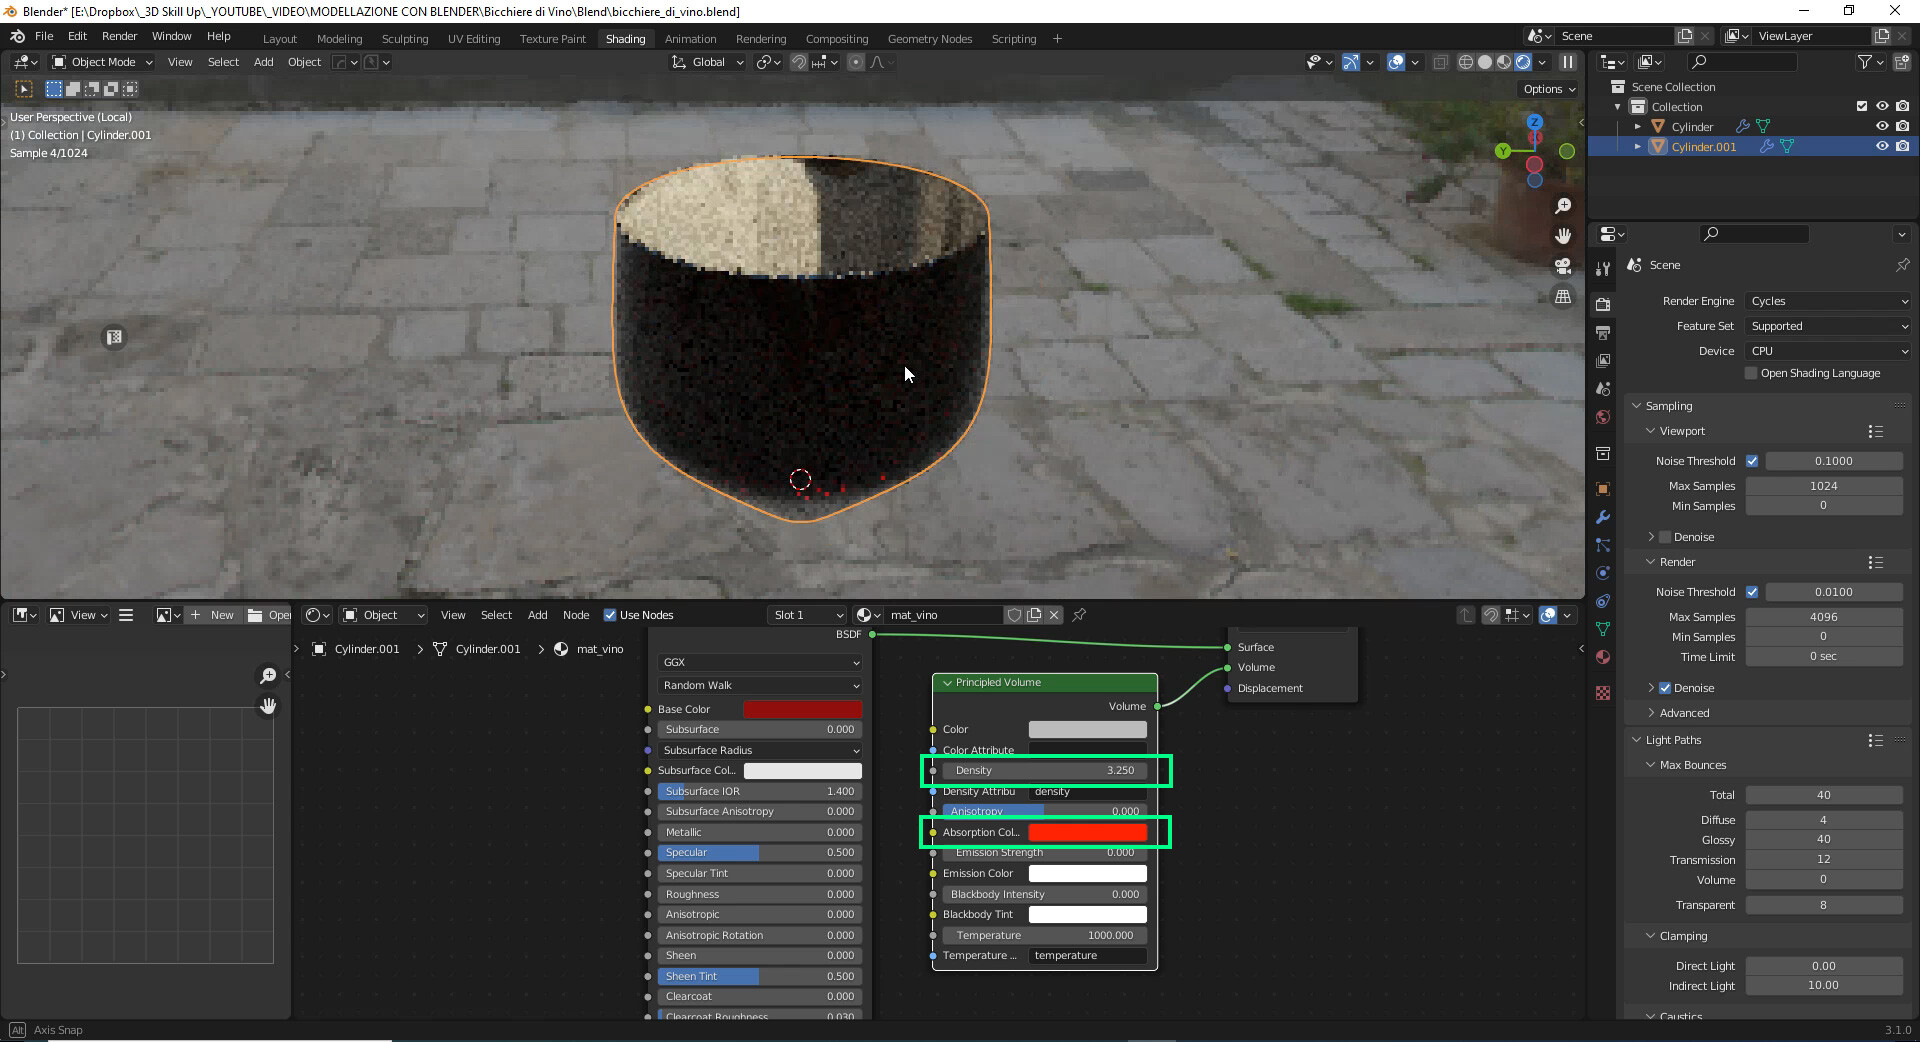
Wine Material
In the same way we create the wine material. Select the mesh in object mode and assign a new material mat_wine. As for glass we set transmission value to 1 and roughness to 0. For this liquid we will additionally use the:
✔️ Principled Volume node
necessary because otherwise the liquid would look too clear and clean. Instead it needs some consistency, some depth.
Then we insert the Principled Volume node from the Shader Editor pressing Shift+A then Shader->Principled Volume. We increase the density and change the color absorption. In this way we will absorb part of the light as it passes through the volume, creating a more "dense" liquid. And that's what we were looking for!
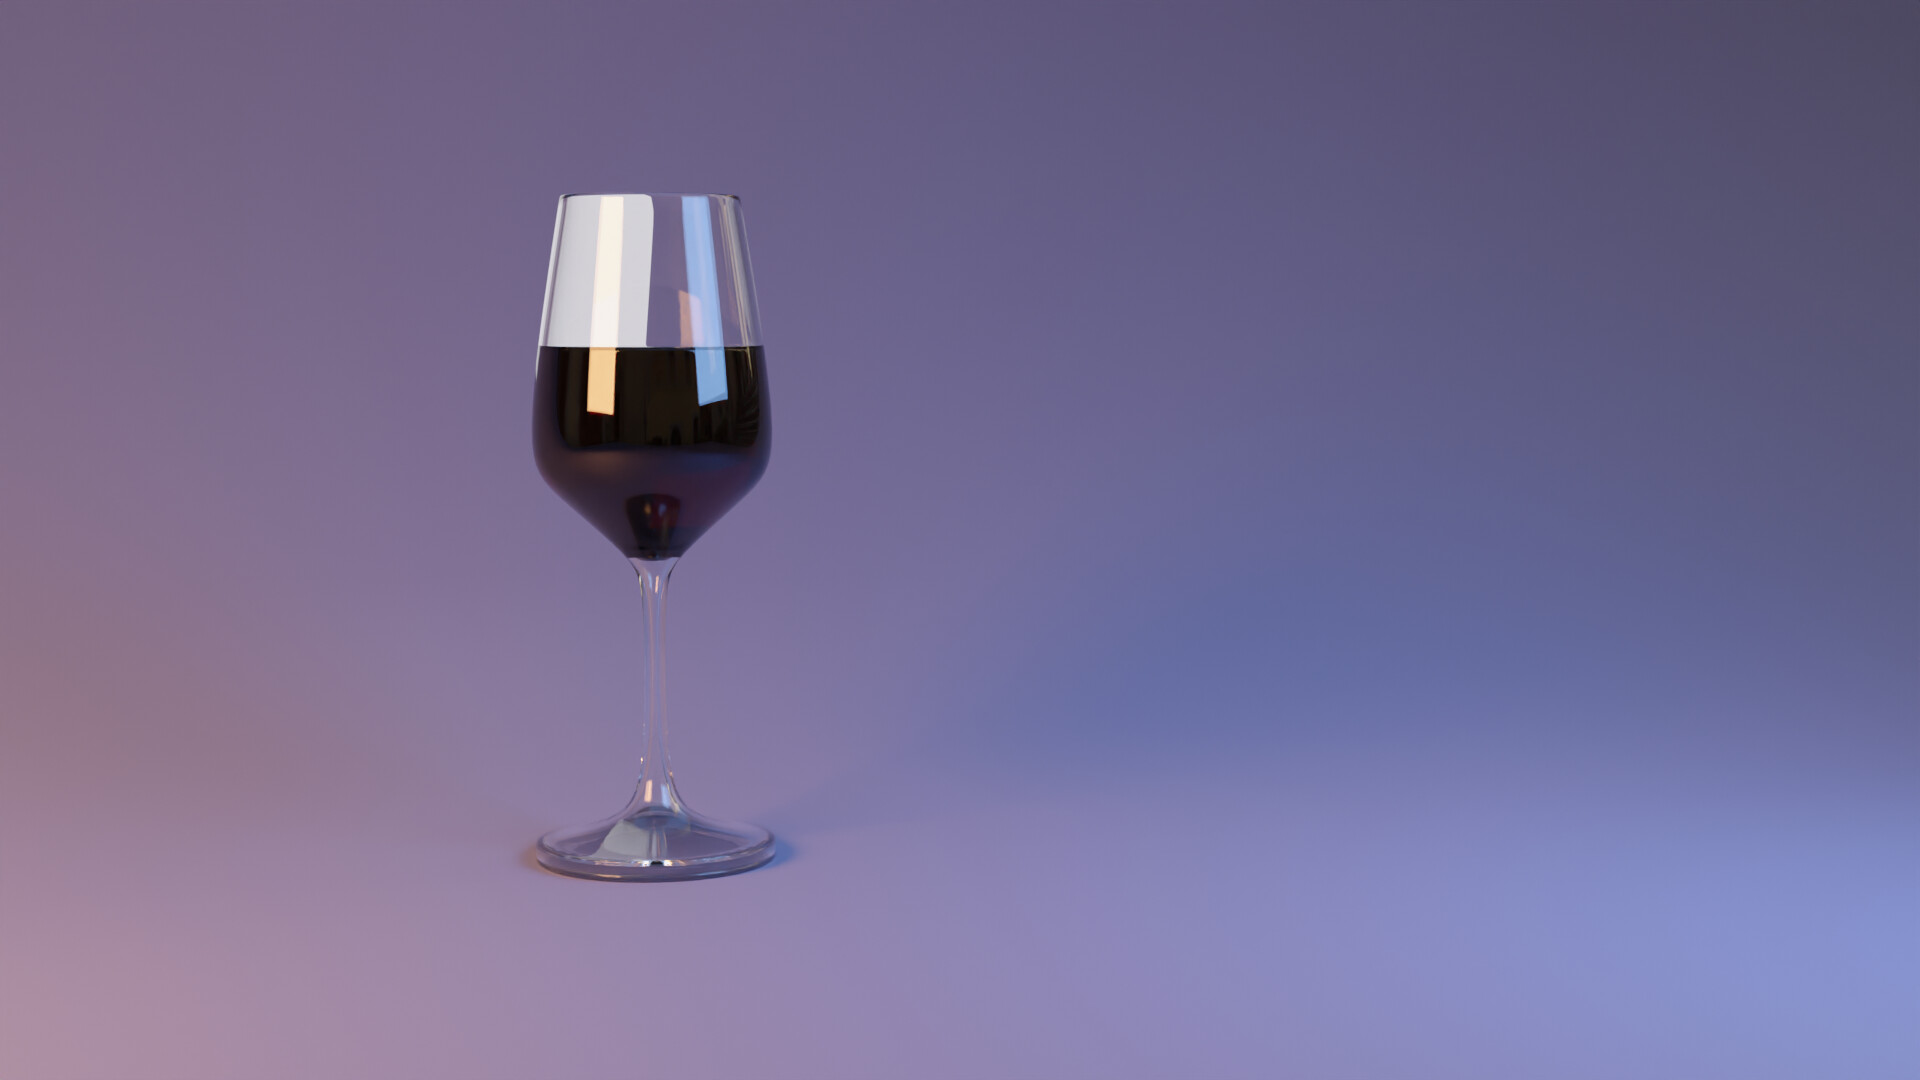
💡 Let's set the lighting and launch the rendering!
We insert a floor and a camera and use the three-point lighting type. We add a key light shifted to the left about 45° from the camera. We add a fill light to the right at 45° from the camera, and a back light behind the object. The light intensity should be set like this 100% key light, 50% fill light and 20% back light.
We use a warm color for the key light and a cool color for the fill light so that we have a nice warm-cold transition.
🔥 Then in the Render Properties tab set the samples to 150 plus denoise and start rendering!
🍷 And here's how to create a realistic wine glass with Blender!
▶️ If you want you can follow the whole process on YouTube (🇮🇹 Italian audio with 🇬🇧 English subtitles)
❤️ If you'd like, support my content creation by following me on:
👉 Follow me on Artstation
👉 Follow the 3D Skill Up Youtube Channel (Italian audio with English subtitles)
👉 Follow 3D Skill Up